
How to Create and Manage Invoices in Buildmate
Managing your cash flow is now just as easy as managing your site schedule. Introducing a complete Invoicing Workflow that allows you to manage the lifecycle of your invoices directly within Buildmate.
Prefer a video walkthrough?
Follow along with our video walkthrough below 👇
1. Access the Invoicing Dashboard
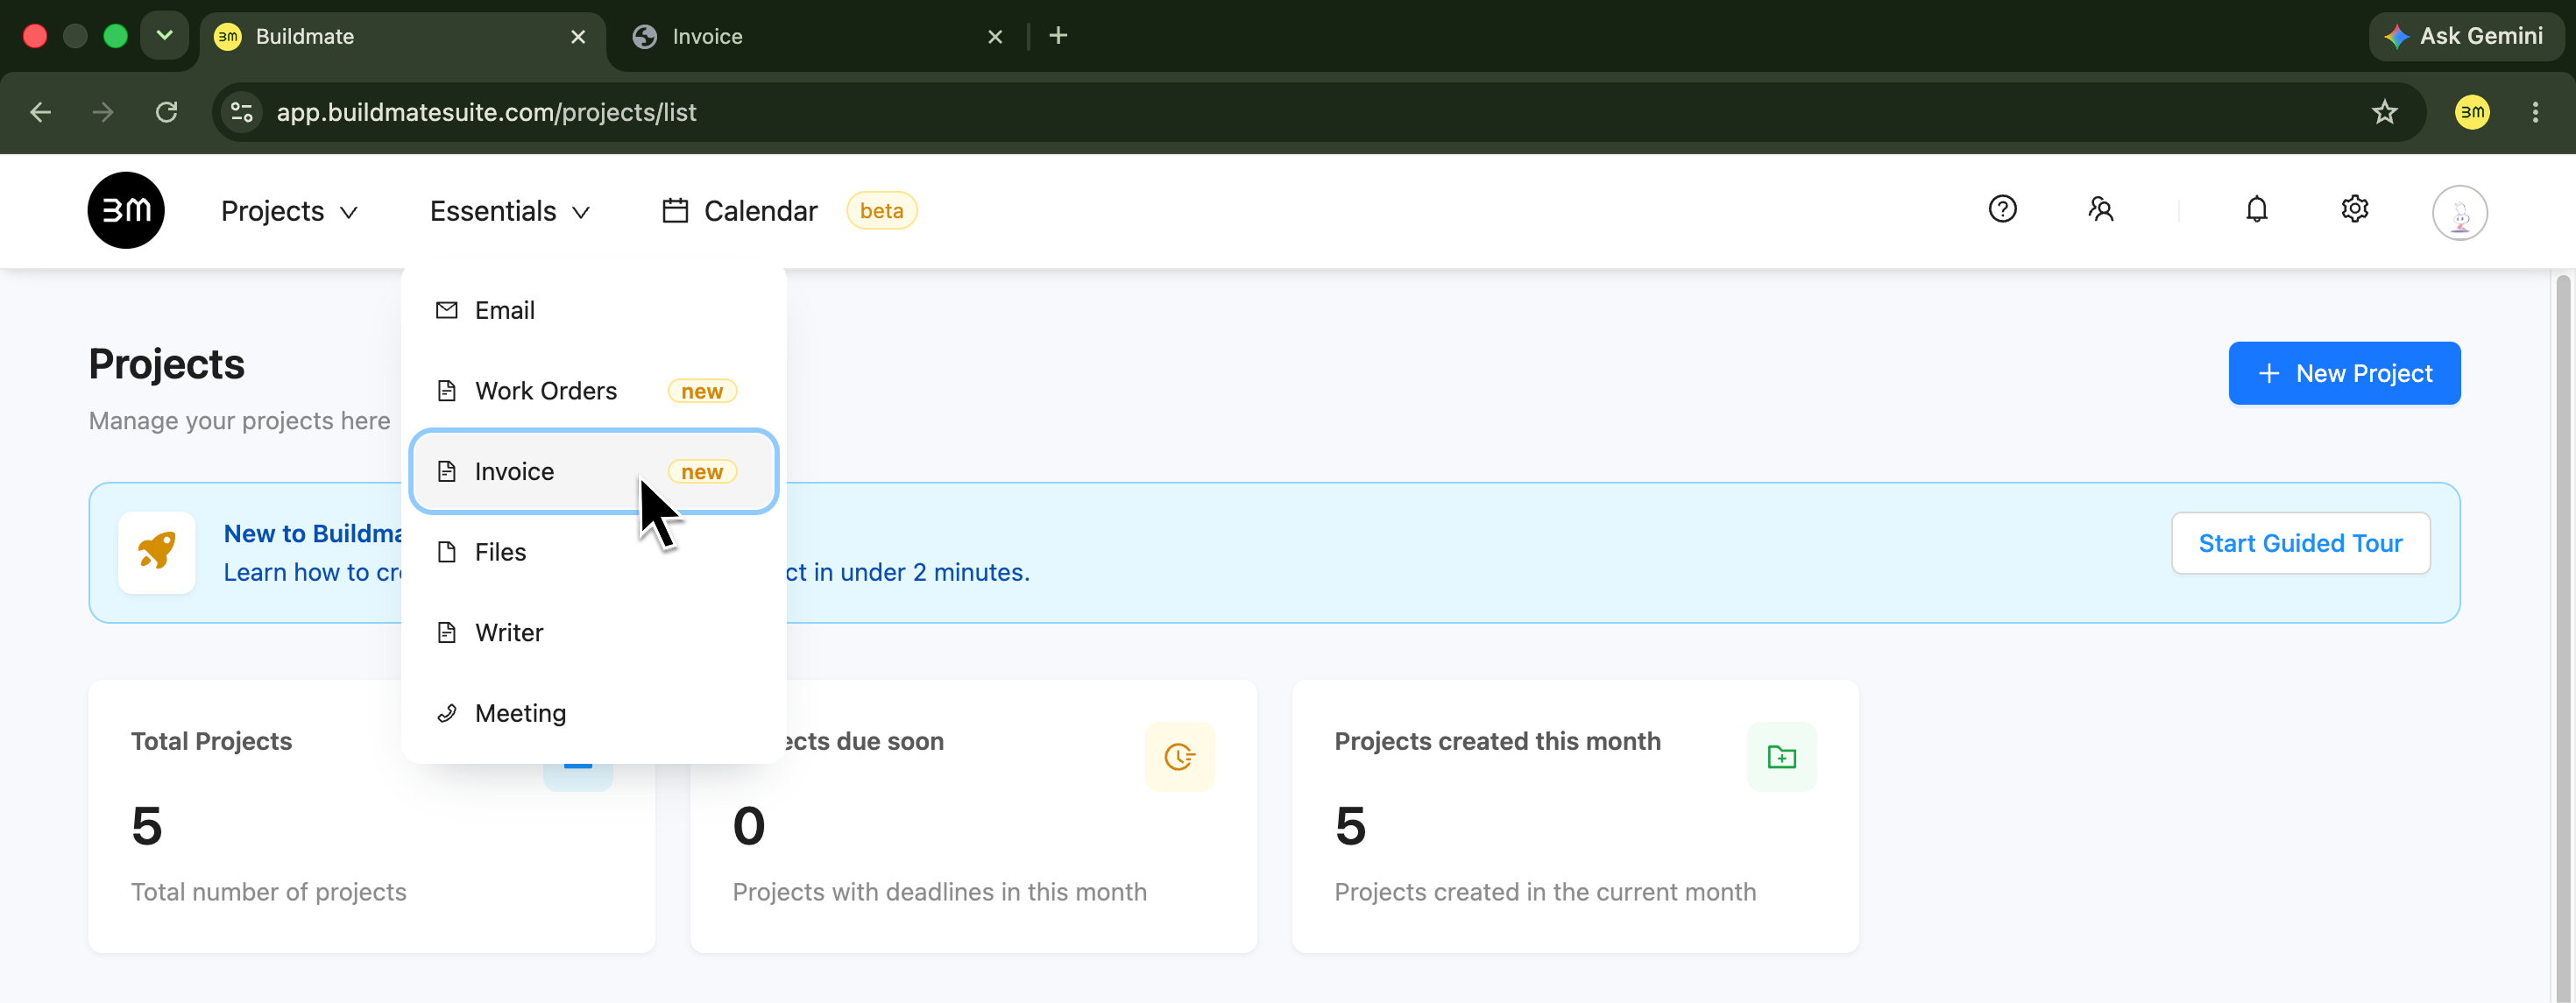
- Navigate to the Essentials dropdown in the top navigation bar and select Invoice.
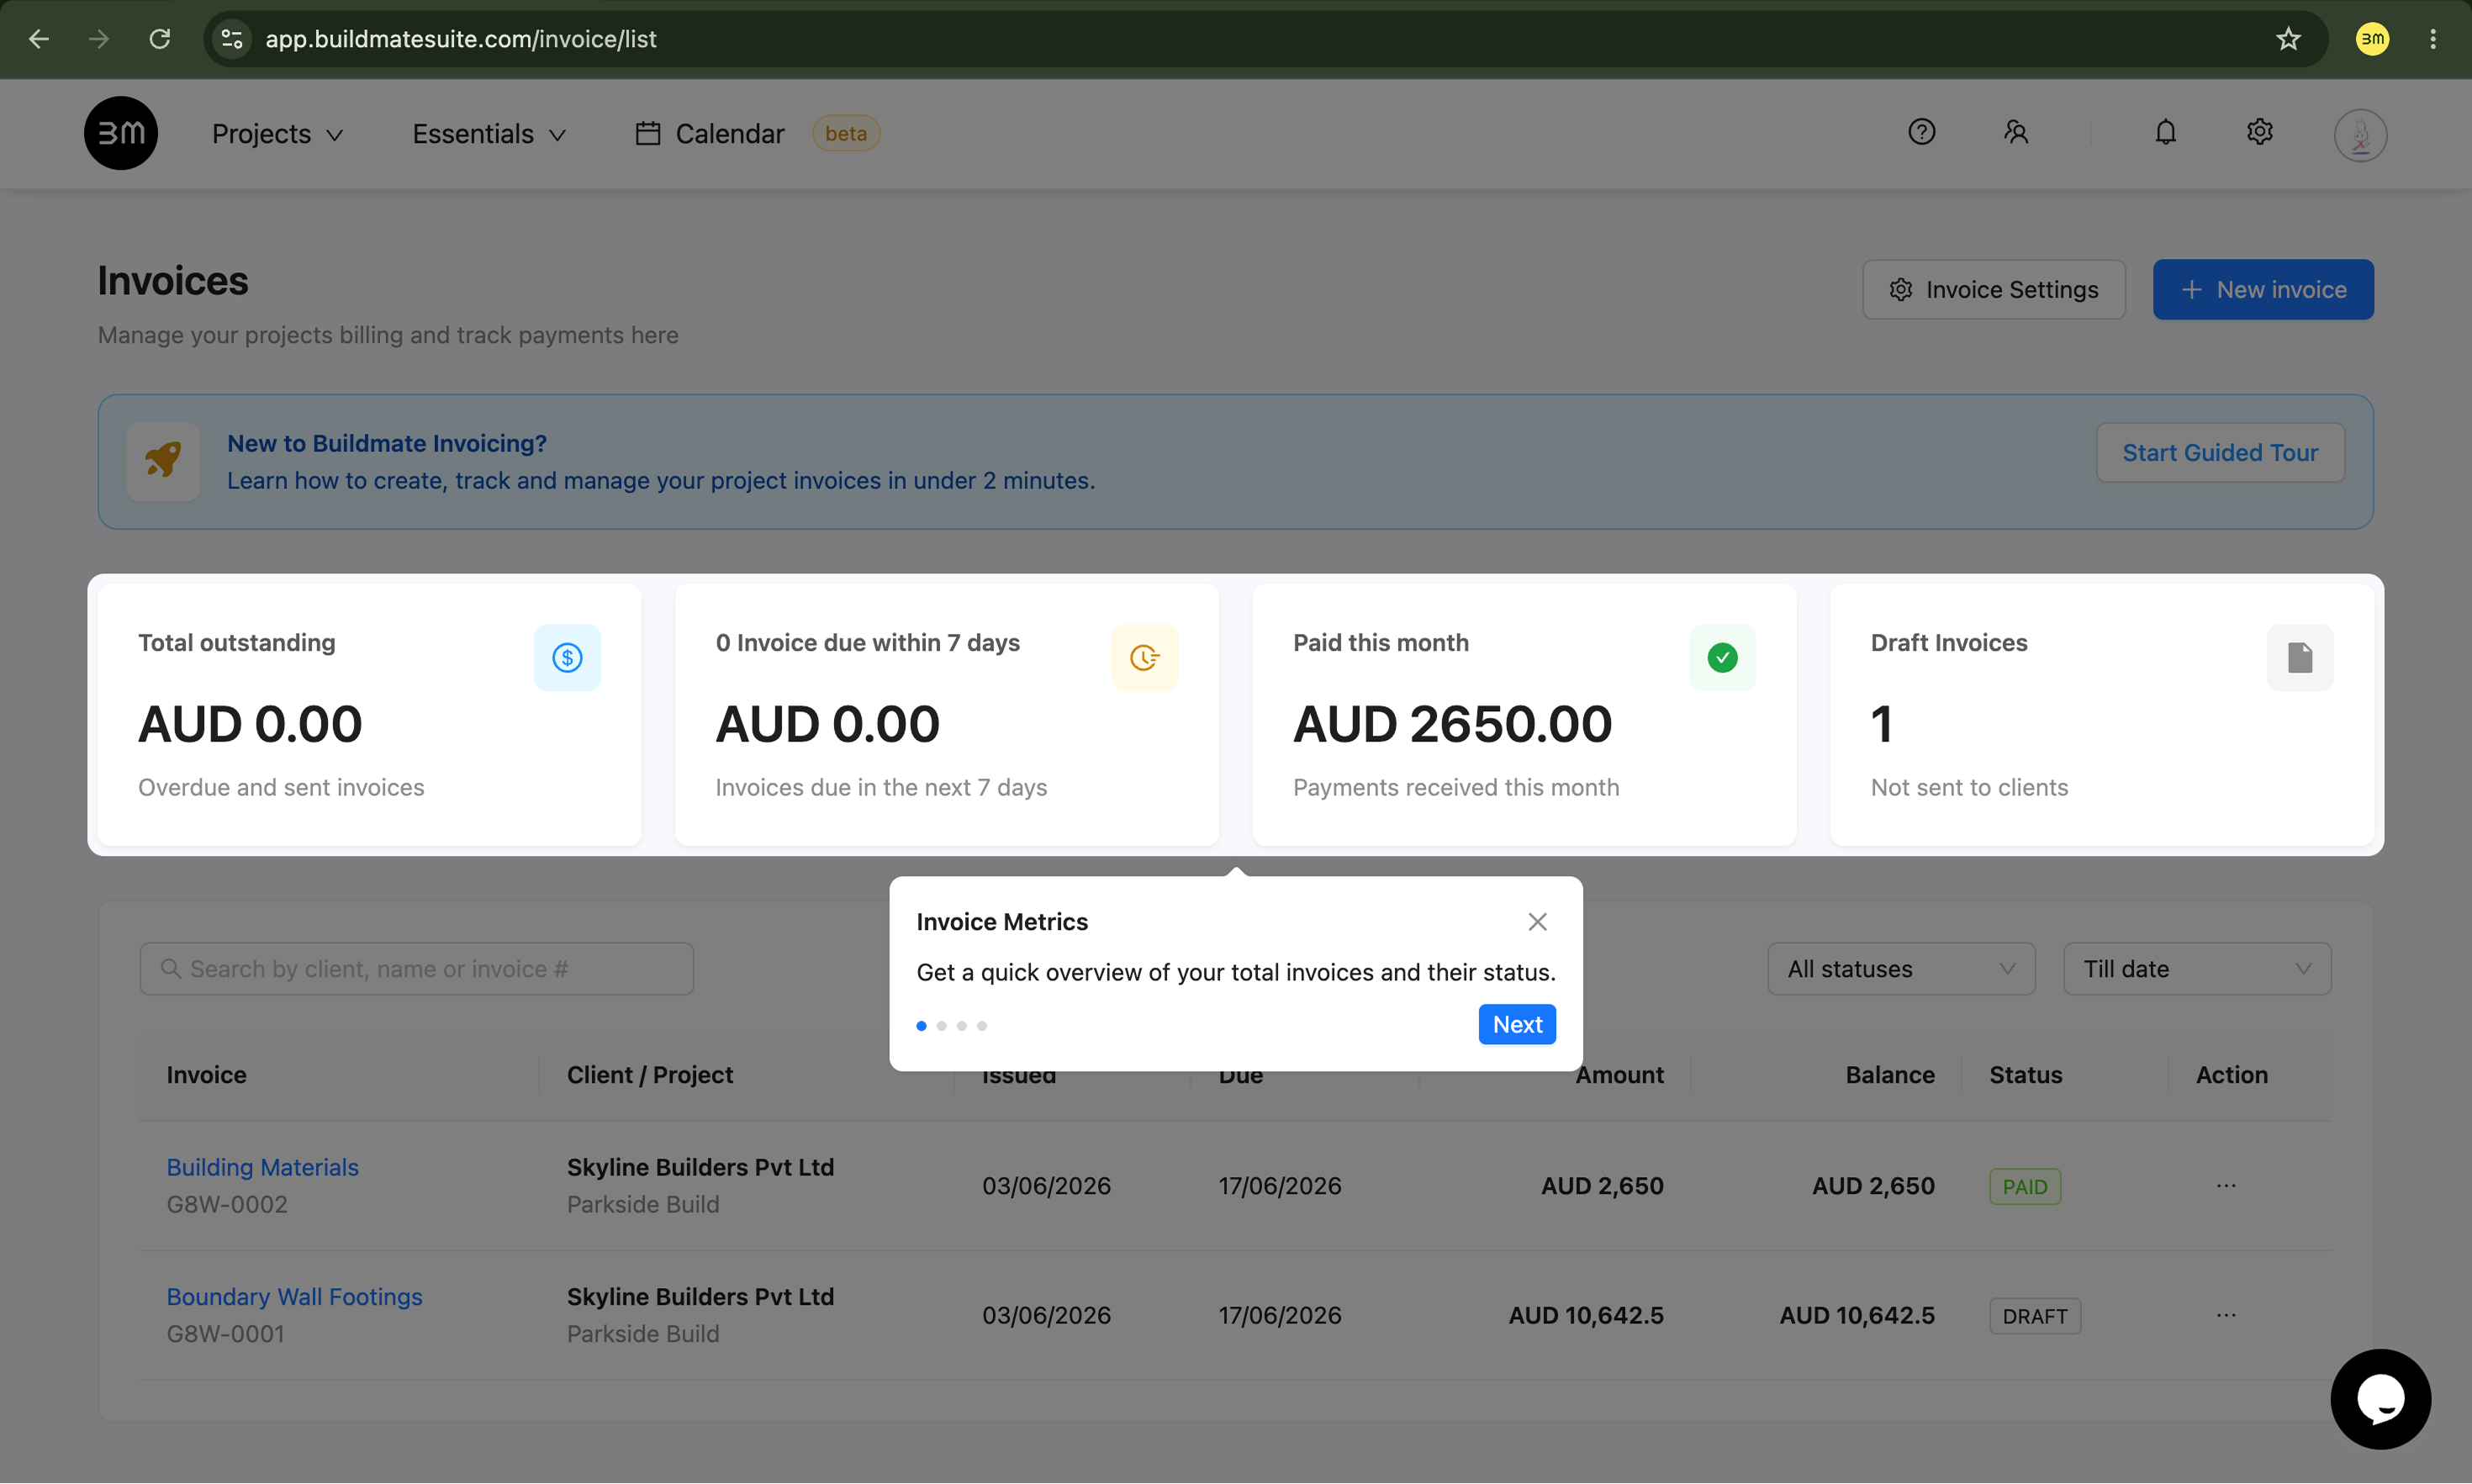
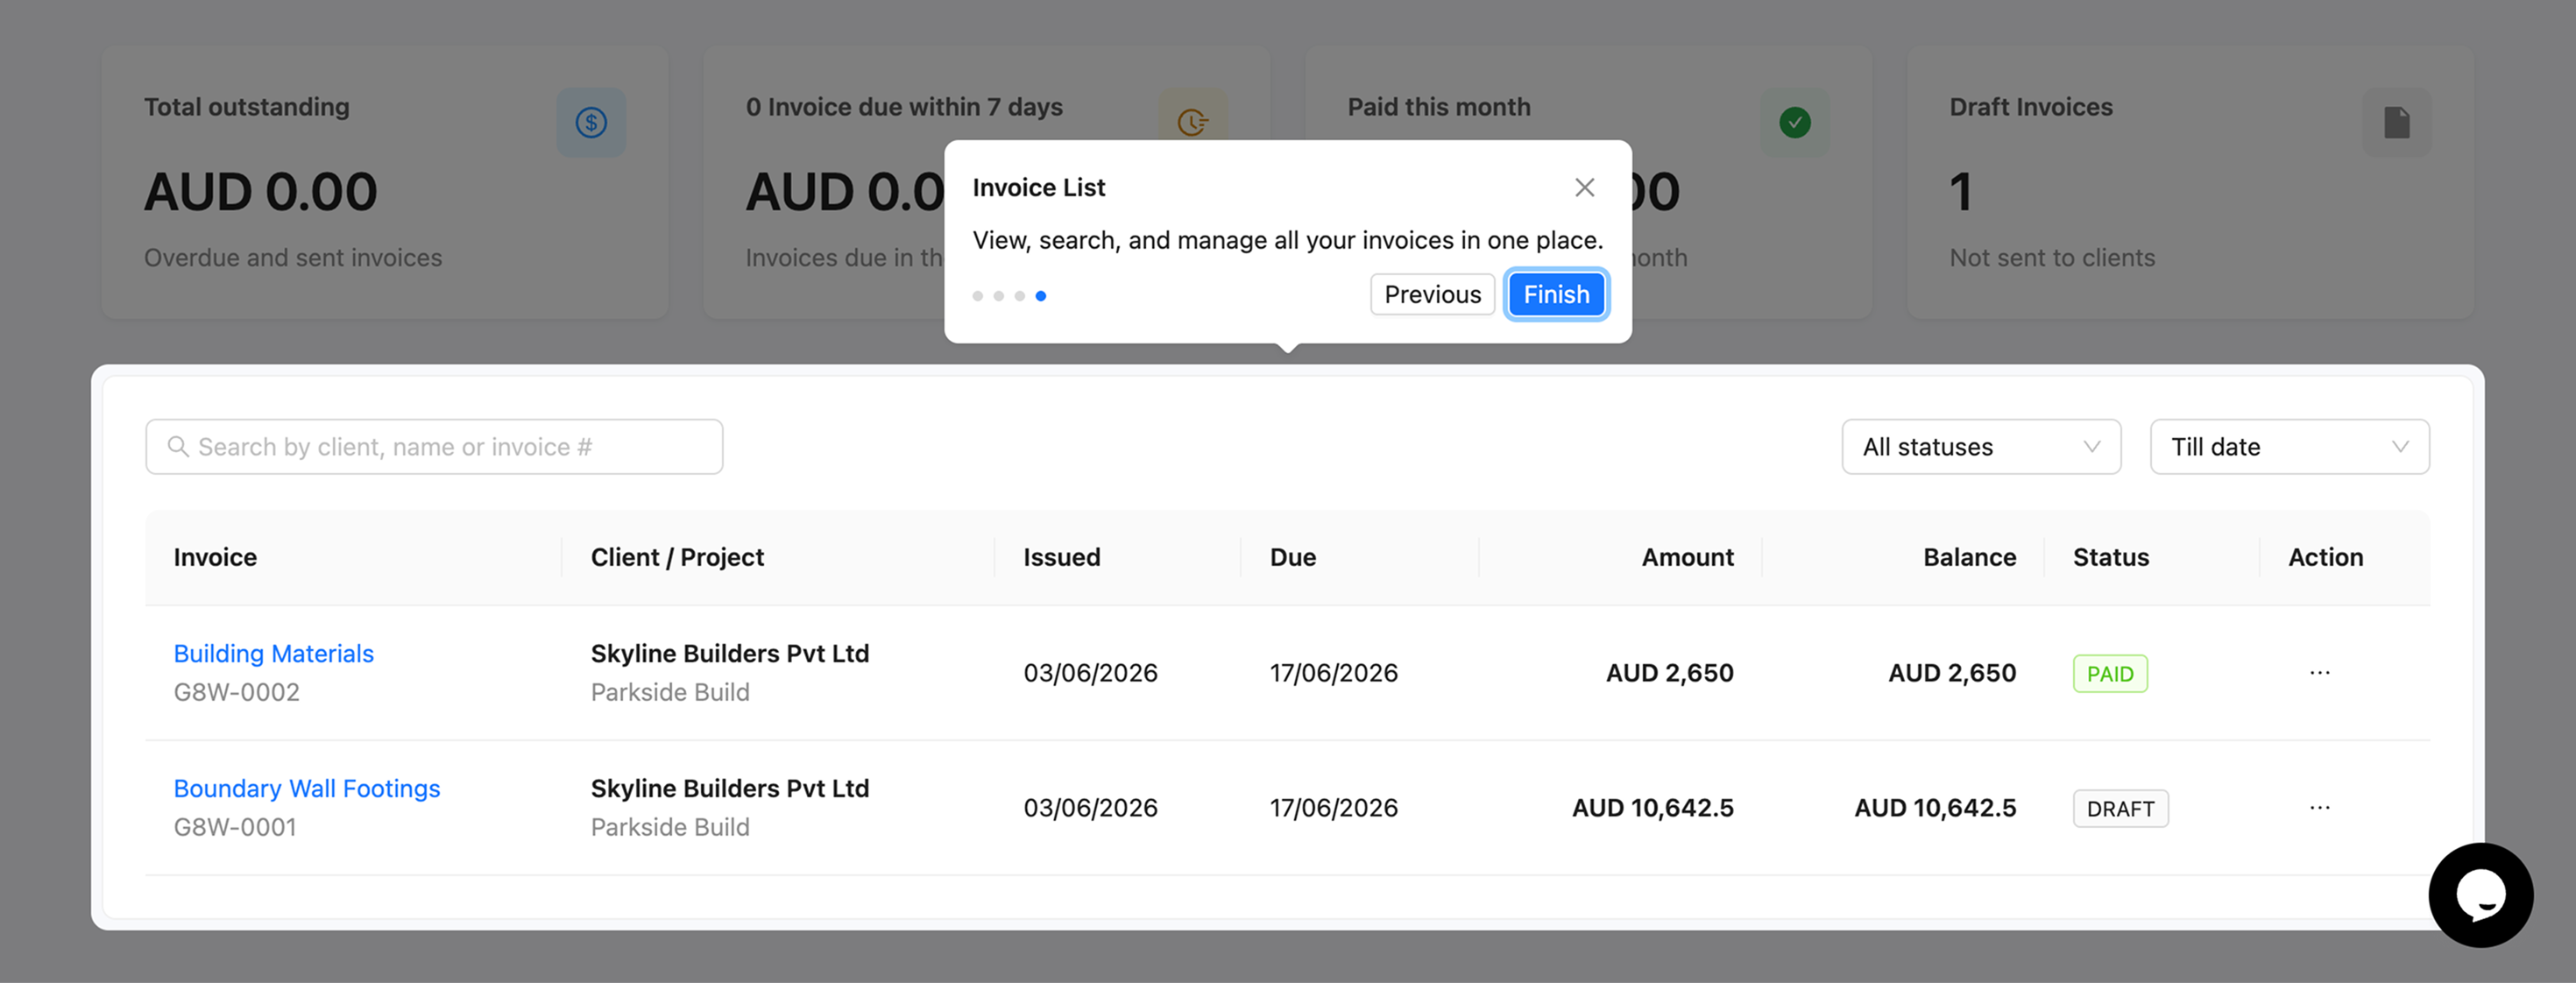
- This is your financial command center giving you a quick overview using Invoice metrics and Invoice Listing to view, search, and manage all your invoices in one place.
Understanding Invoice Metrics
Your dashboard metrics provide a real-time pulse check of your project’s financial health, helping you prioritize follow-ups and manage cash flow at a glance:
- Total Outstanding: View your total expected revenue by combining all overdue and sent invoices
- Due within 7 Days: Specifies number of invoices due in the next week, the next due date and the total amount expected, helping you plan for upcoming site expenses or payroll with certainty.
- Paid this Month: Track all successful collections during the current month to monitor your recent cash inflow.
- Draft Invoices: Spot unbilled work waiting to be finalized, ensuring you never miss a progress claim or billing cycle.
2. Create New Invoice
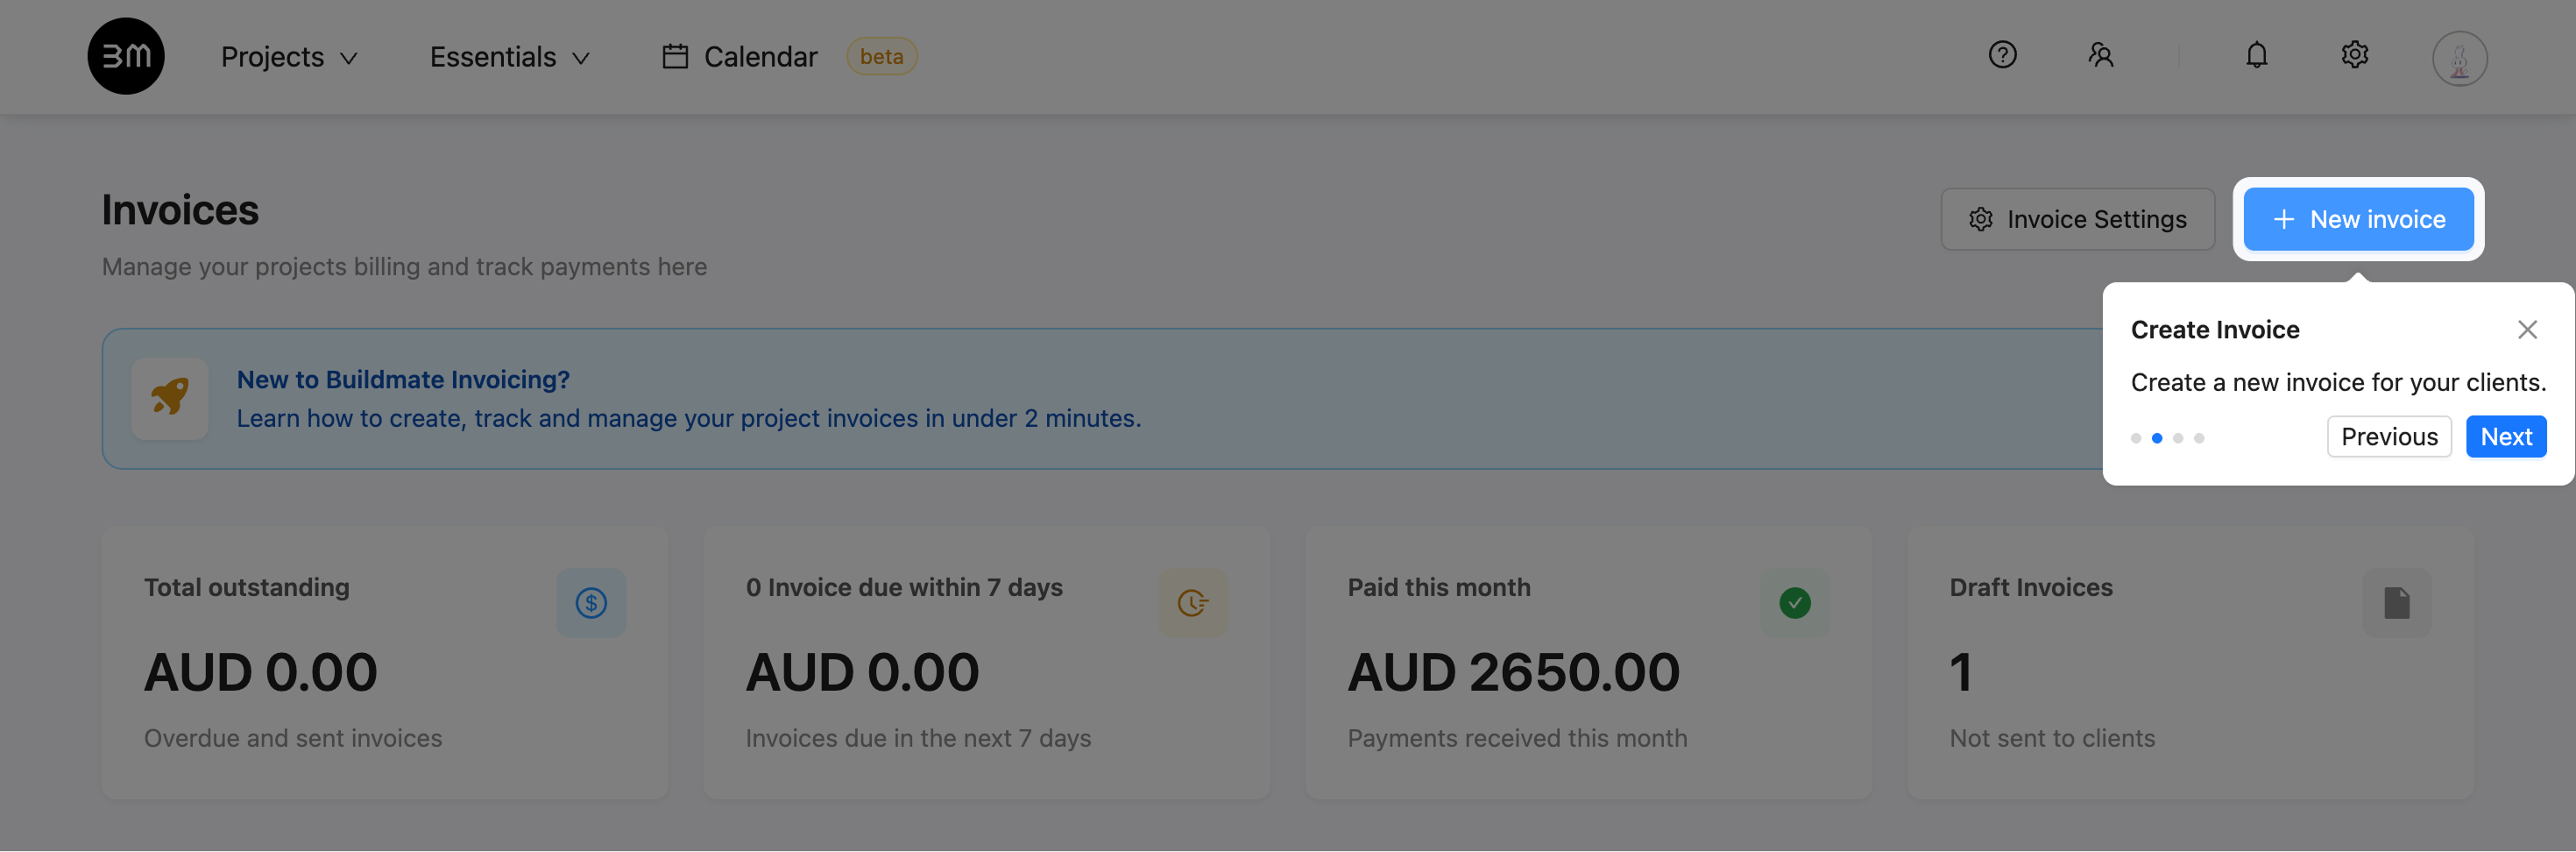
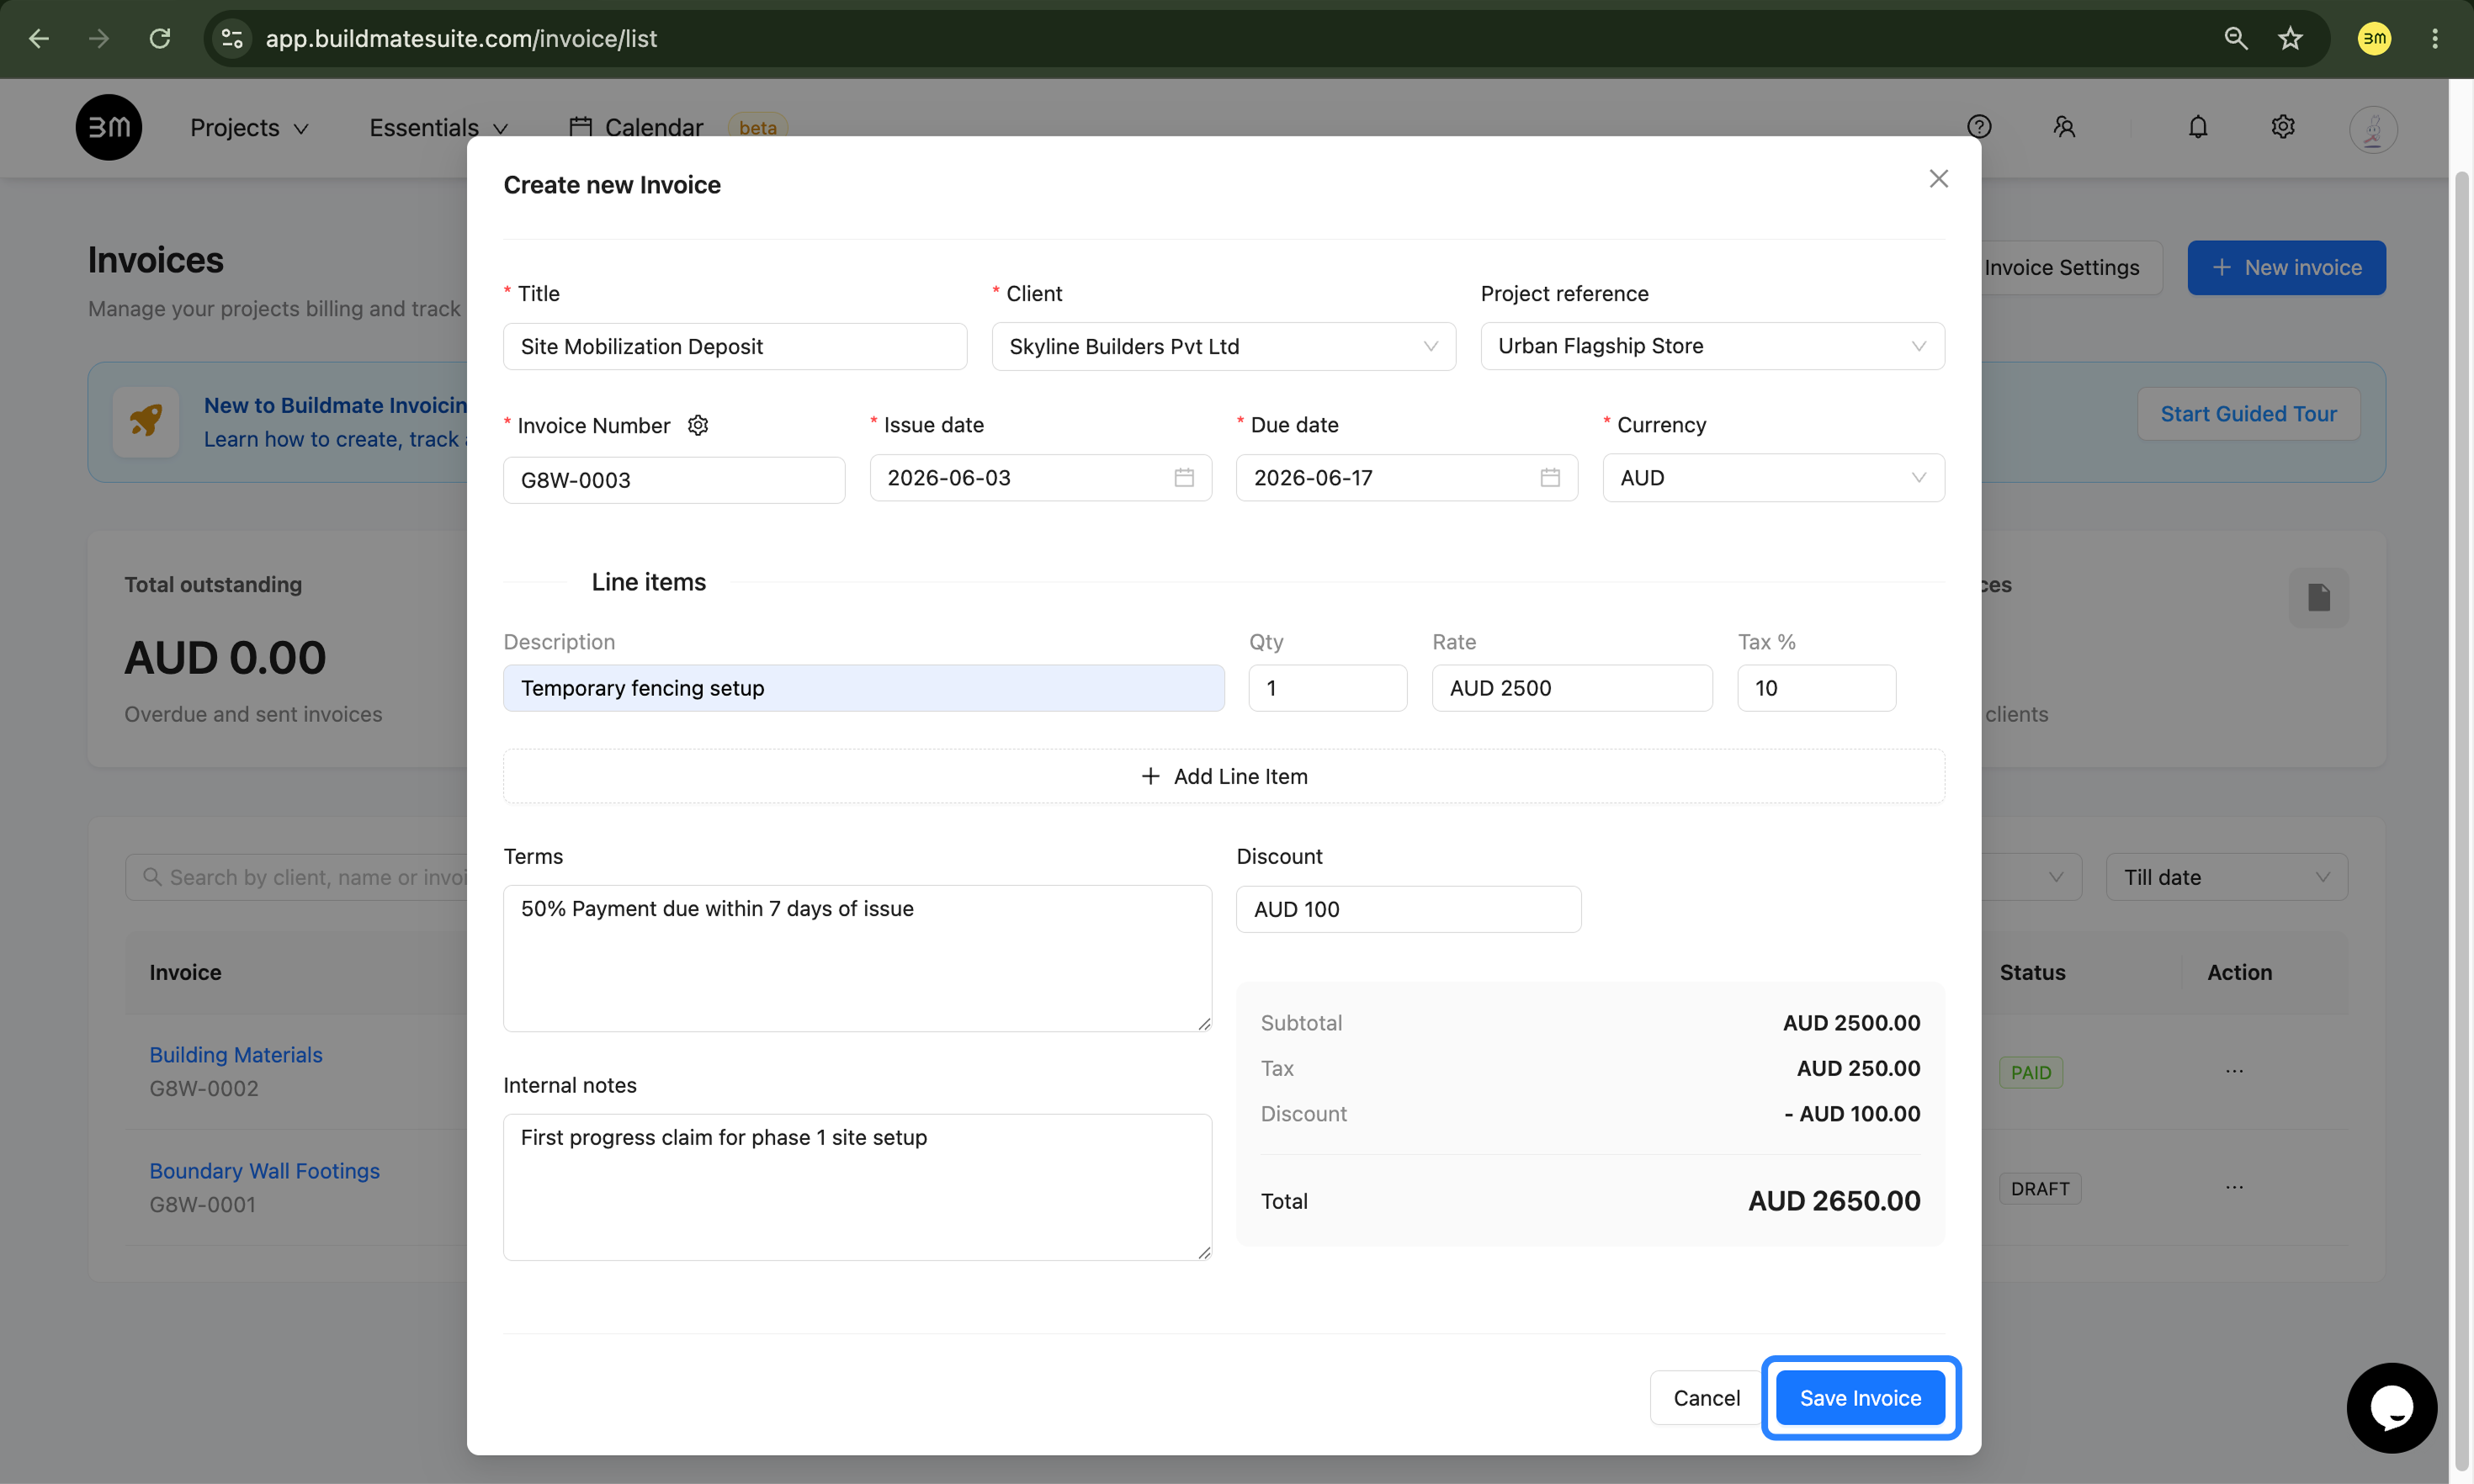
To create a new invoice, click the + New invoice button at the top right. A modal will appear where you define the project and financial specifics:
- General Info: Enter the Title, select the Client (or create new right there), and link a Project Reference.
- Identity: Use the auto-generated invoice id or customize your Invoice Number using the ⚙️ settings gear.
- Dates & Currency: Set the Issue Date, Due Date, and your preferred Currency.
- Line Items: Click
+ Add Line Itemto enter descriptions, quantities (Qty), rates, and tax percentages for your services. Buildmate automatically calculates the Subtotal and Tax amounts for you. - Optionals: Add specific Terms, Discounts, or Internal notes before clicking Save Invoice.
3. View Invoice details and Edit invoice
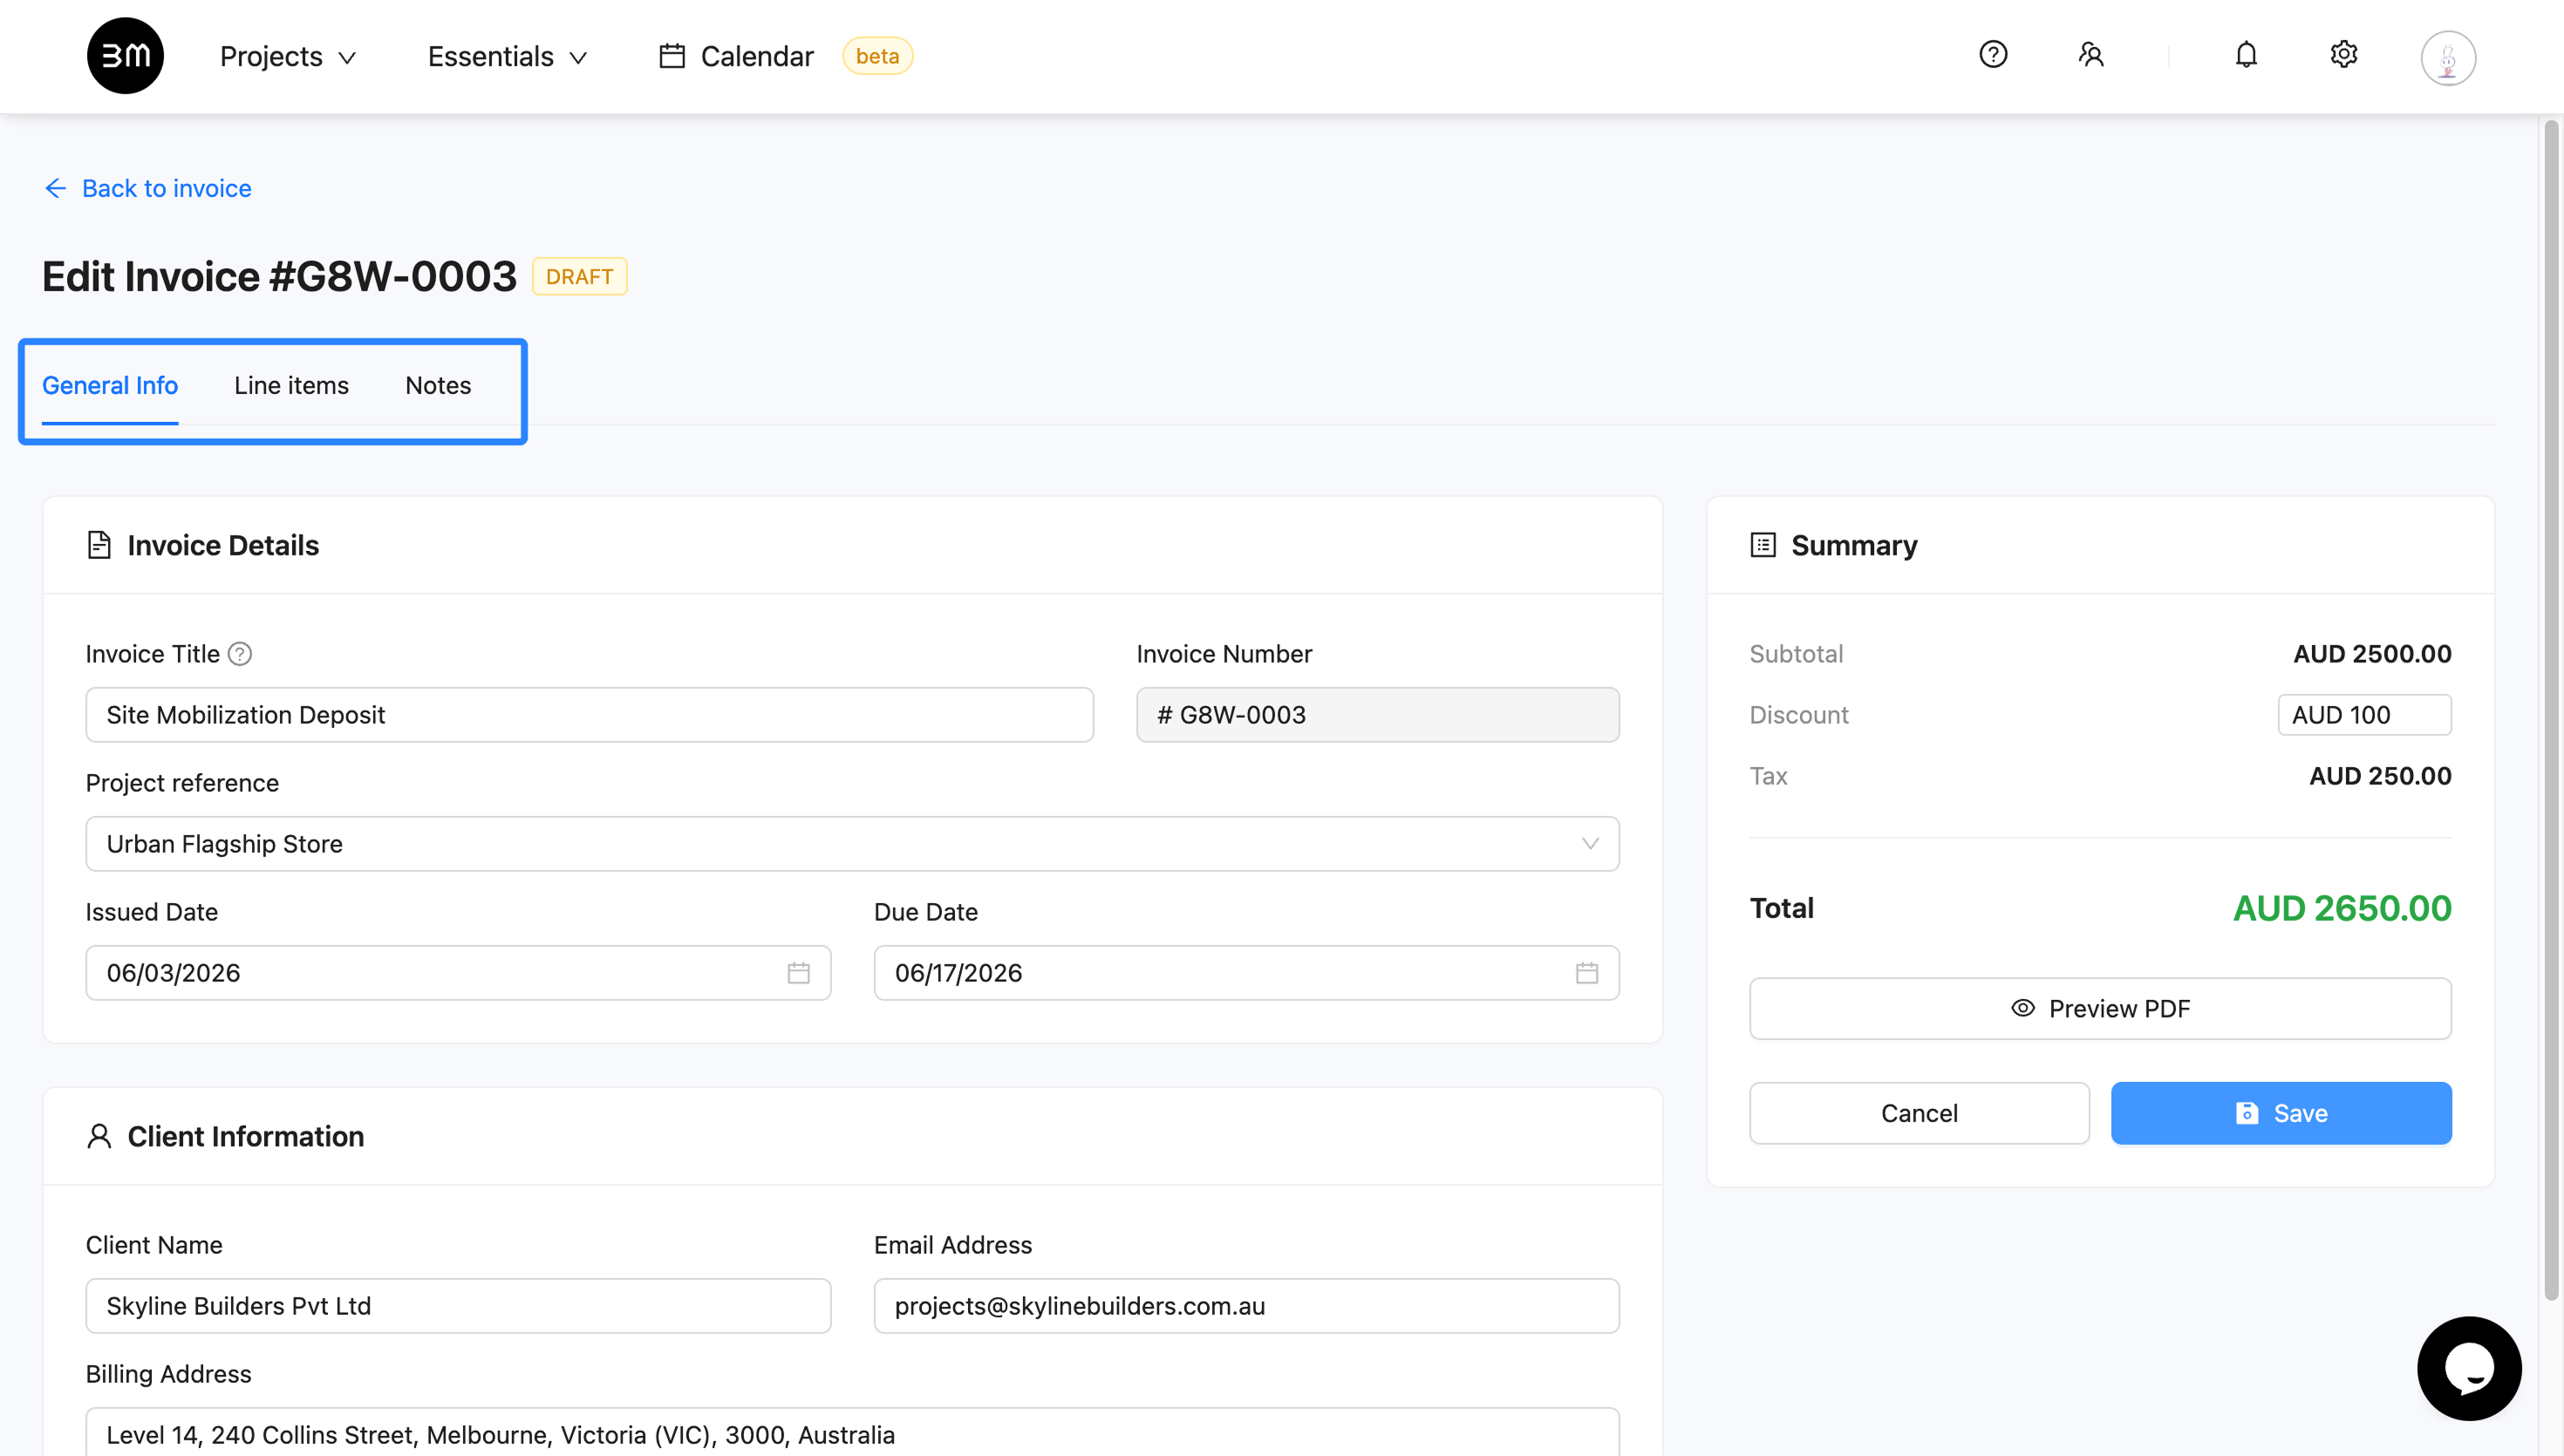
Once saved, click on any invoice in the Invoice listing to view its full details. If you need to make changes, click the Edit Invoice button at the top right to access a structured editing interface.
Navigation between tabs for granular edit control:
- General Info: Update the Title, Project Reference, or Due Dates and Client Information here.
- Line Items: Modify Descriptions, Rates, or Tax % for existing entries, or click
+ Add New Line Itemto include additional work. - Notes: Refine Terms & Conditions, adjust Discounts, or update private Internal notes.
- Saving Your Changes: Always check the Summary sidebar one last time to ensure the Total reflects your edits and click Save to update changes.
4. Review and Send to Client
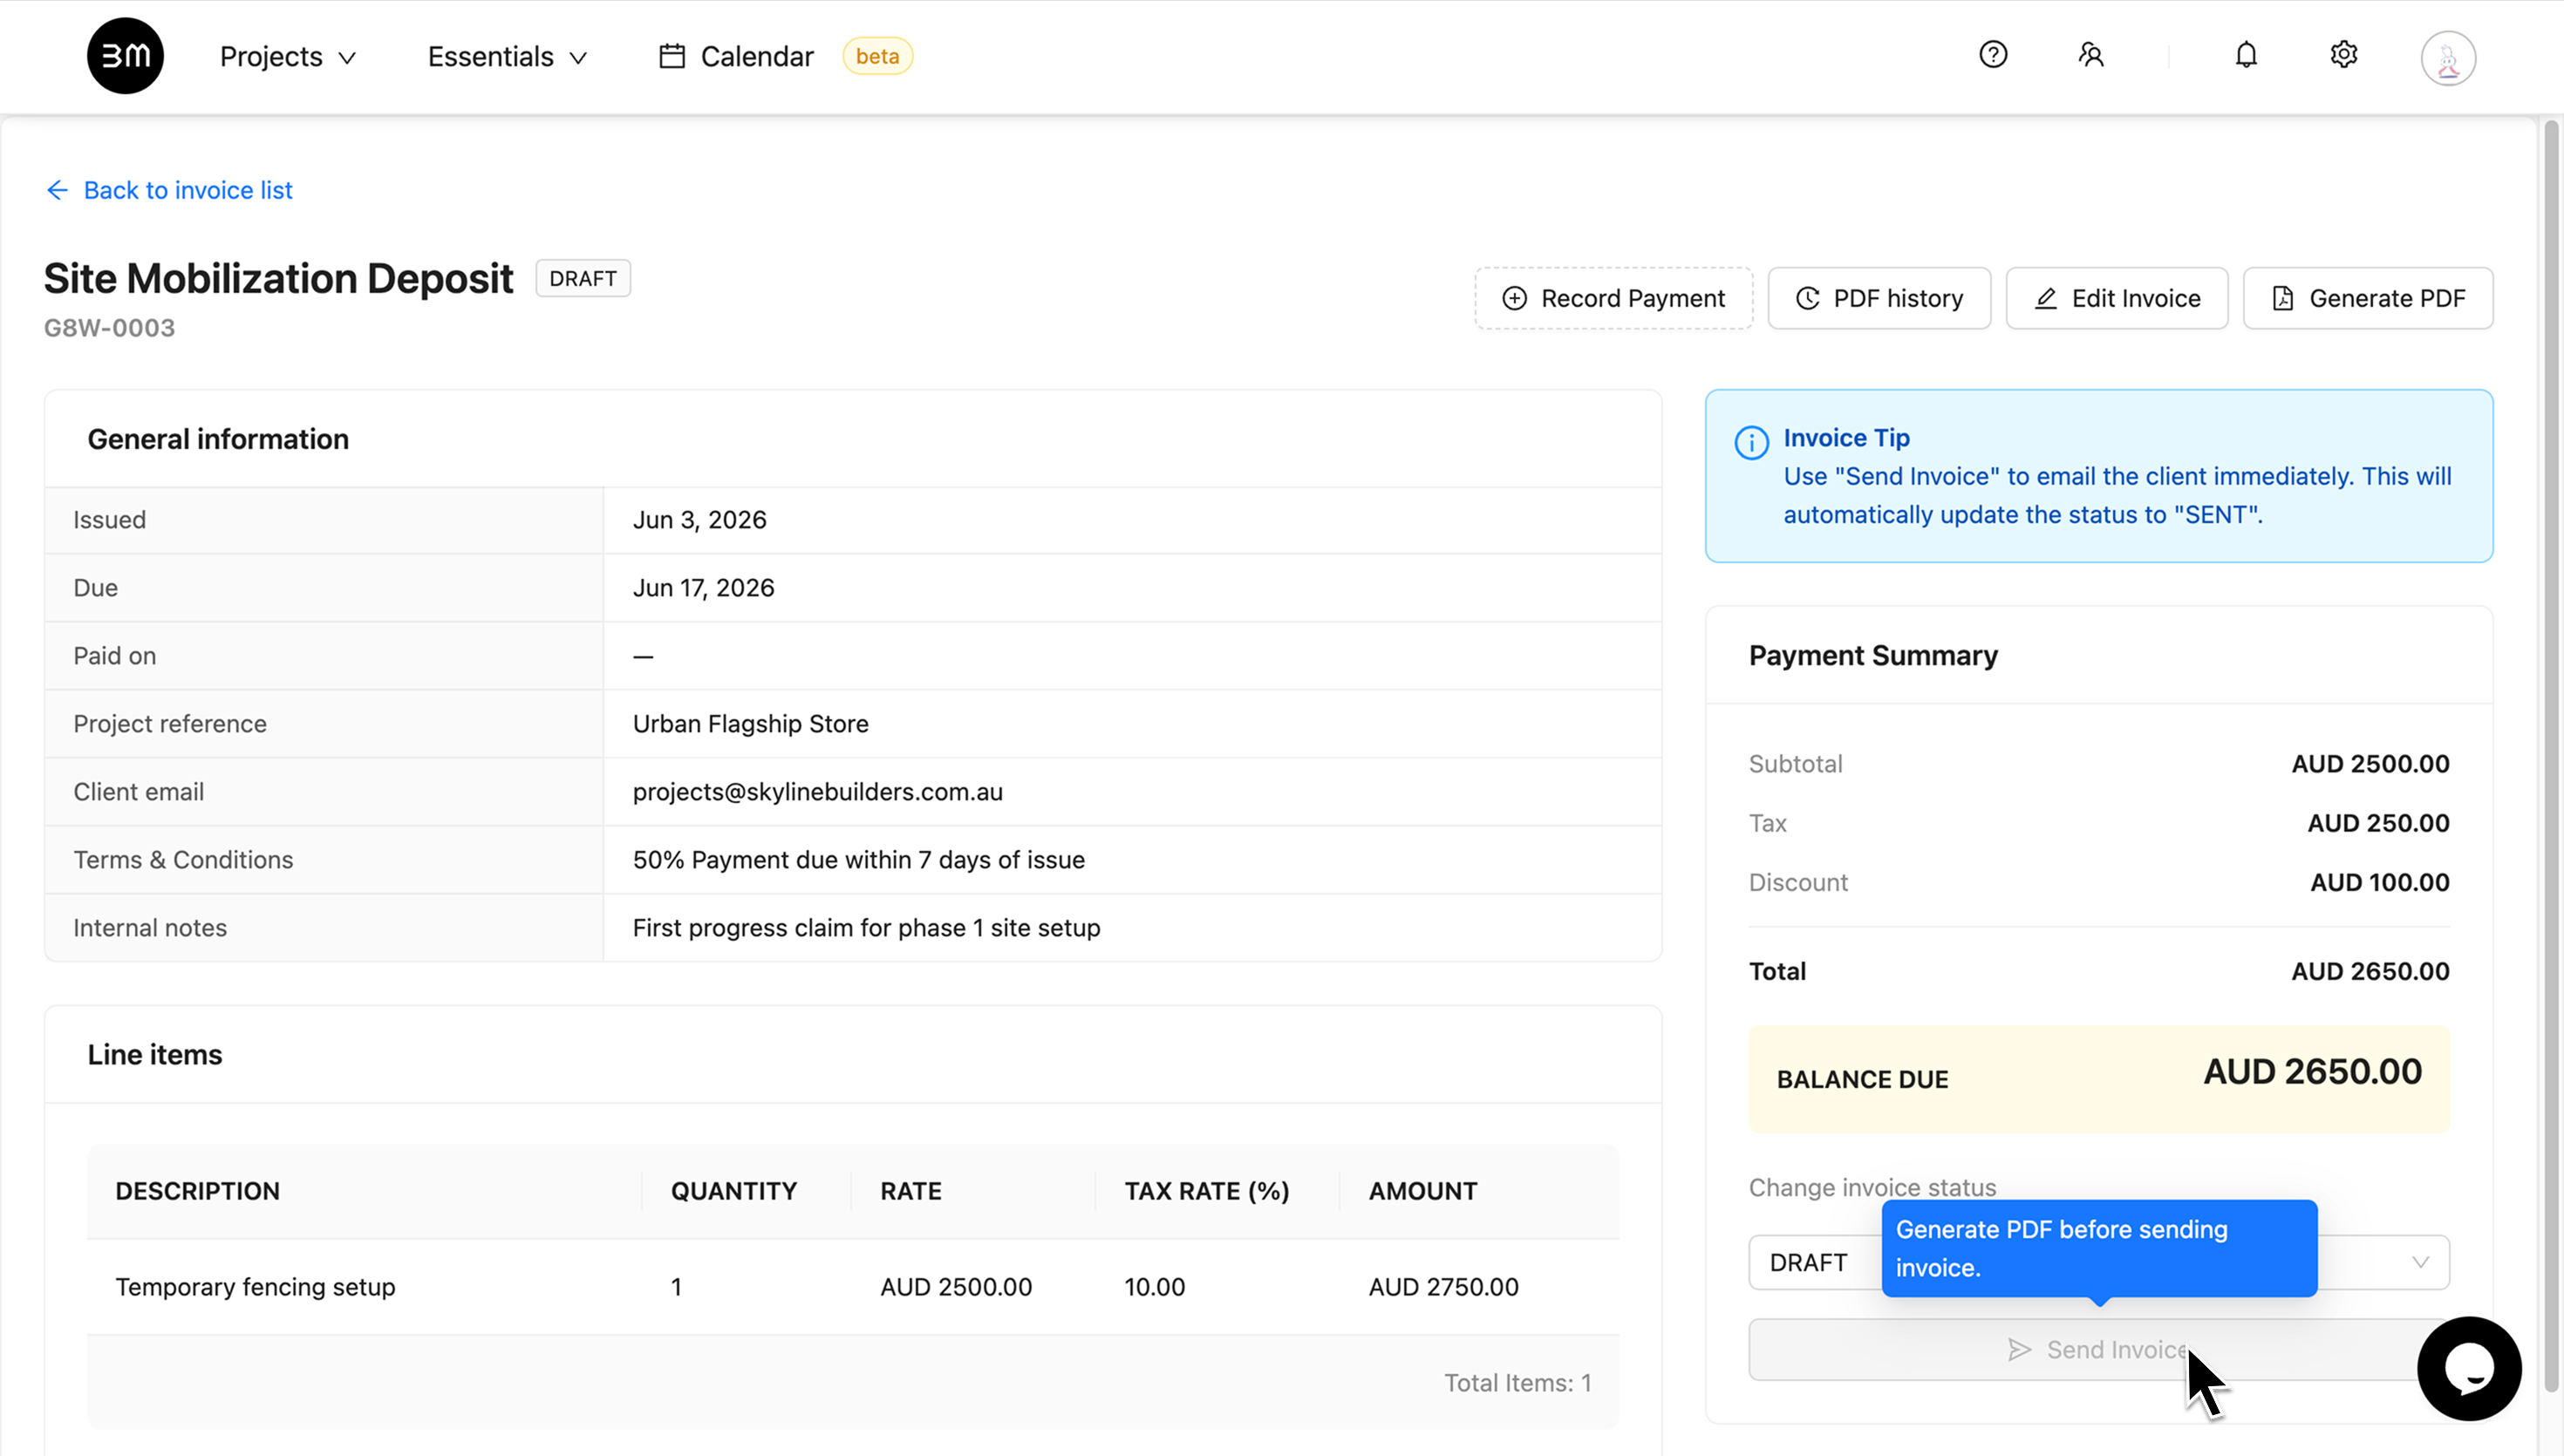
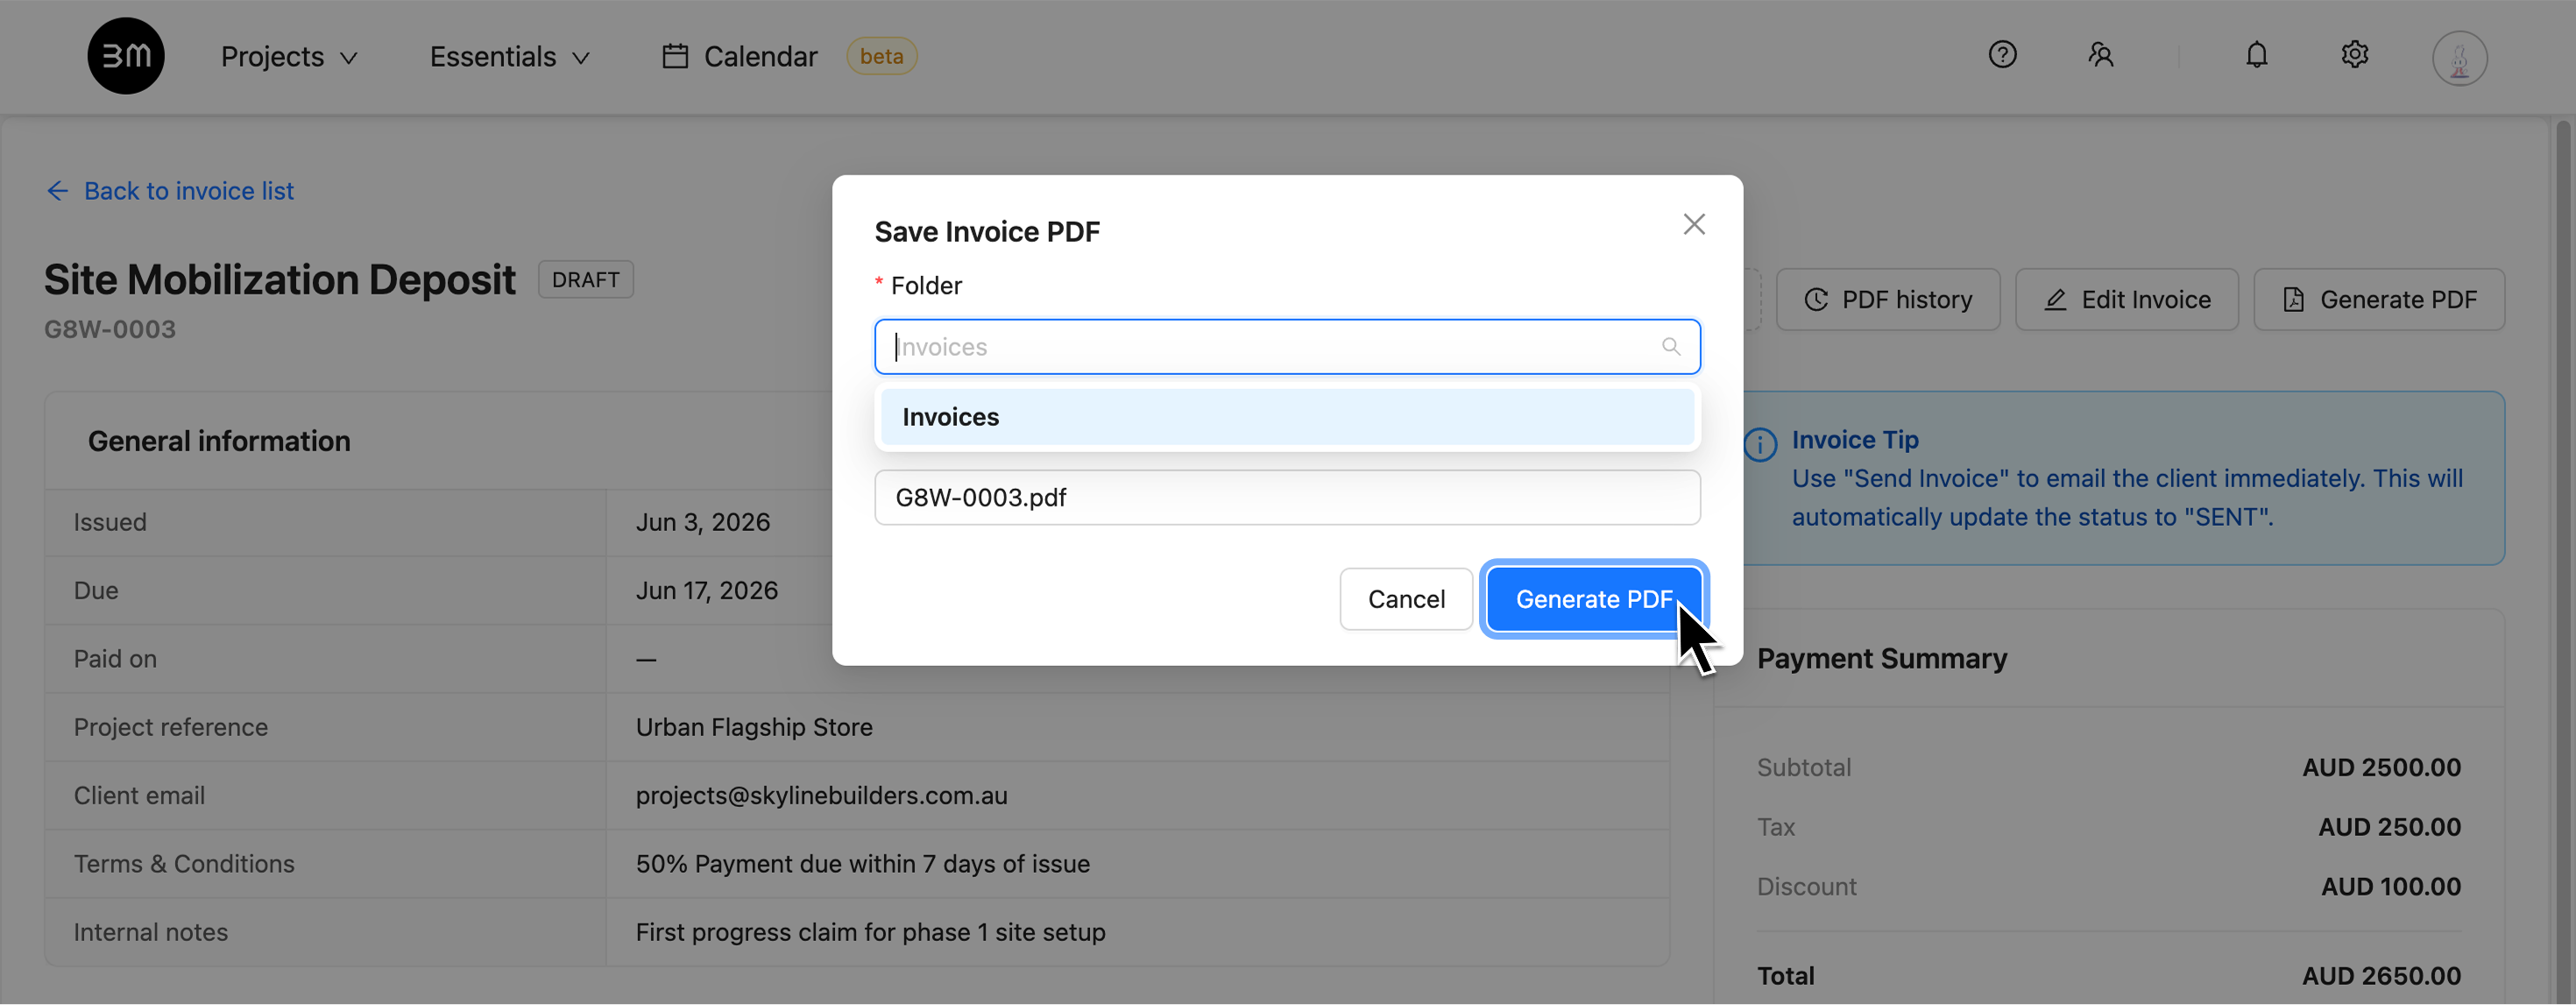
- Generate PDF: Before you can email your invoice, you must click Generate PDF first; the Send Invoice button will remain disabled until the document is finalized.
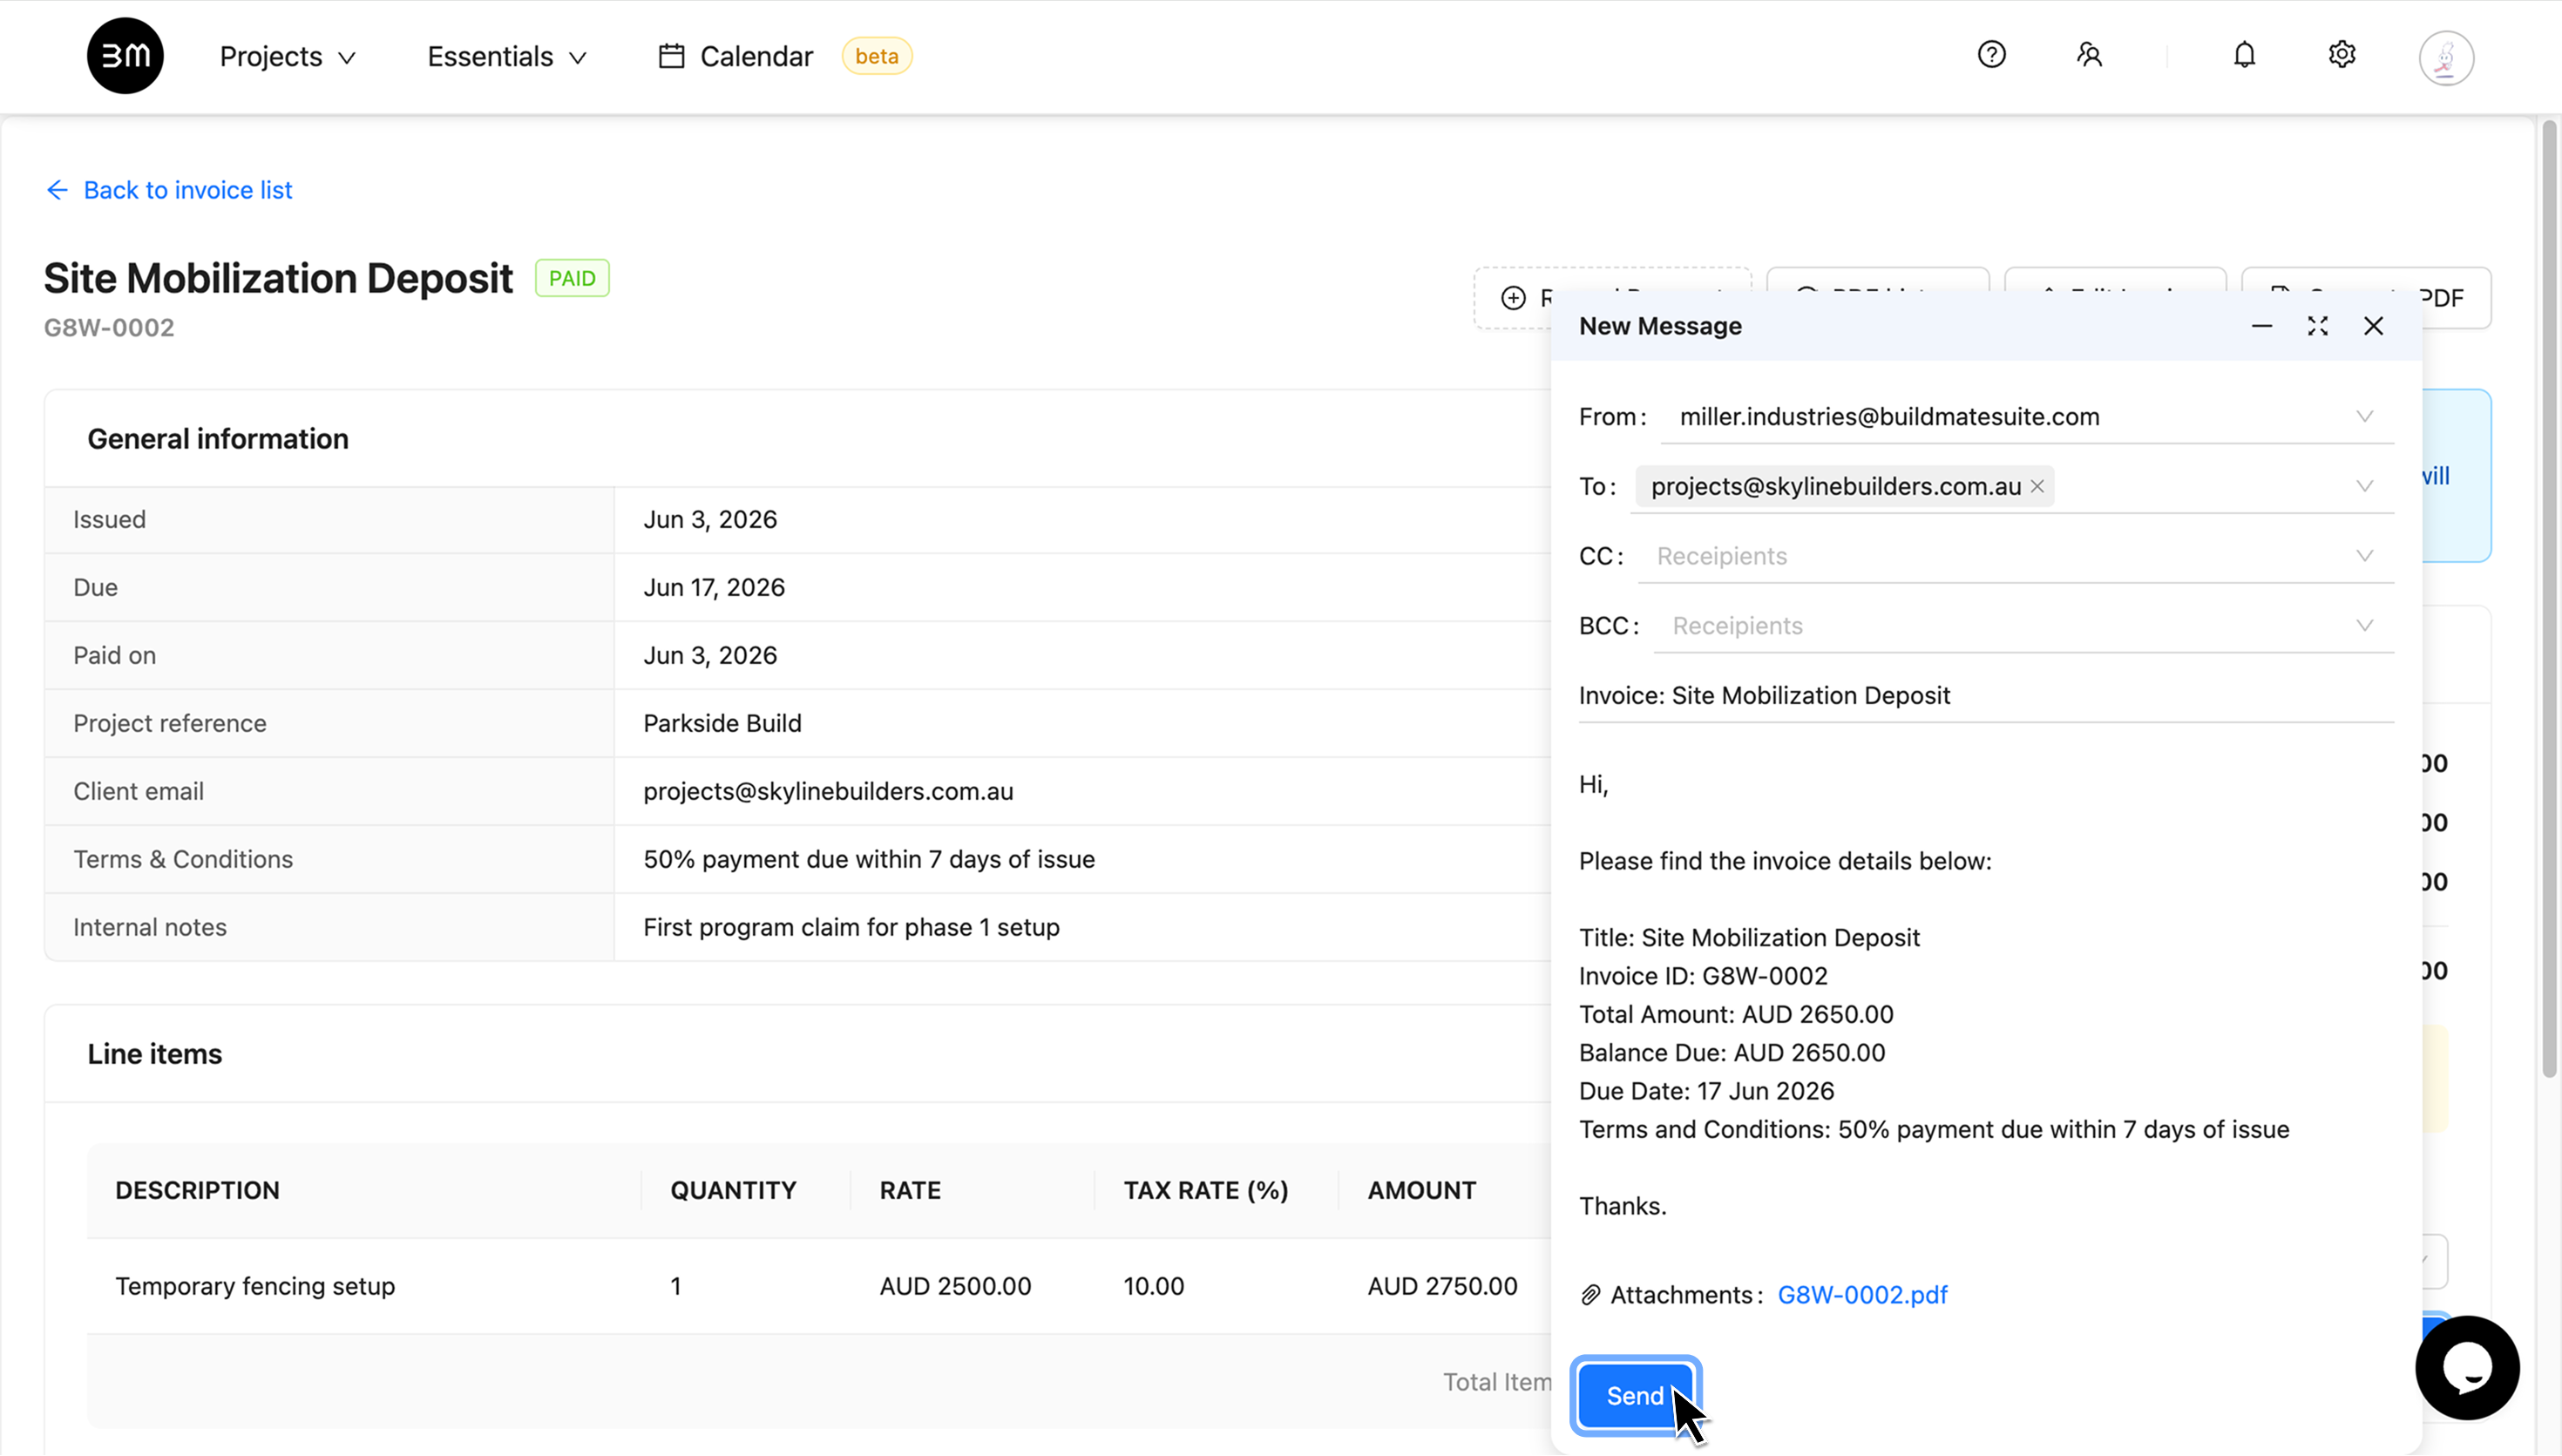
- Emailing: Once generated, click Send Invoice to open the email modal. Fill in the Recipients, Subject, and Message body to deliver the invoice directly through Buildmate.
5. Manage Invoice Status
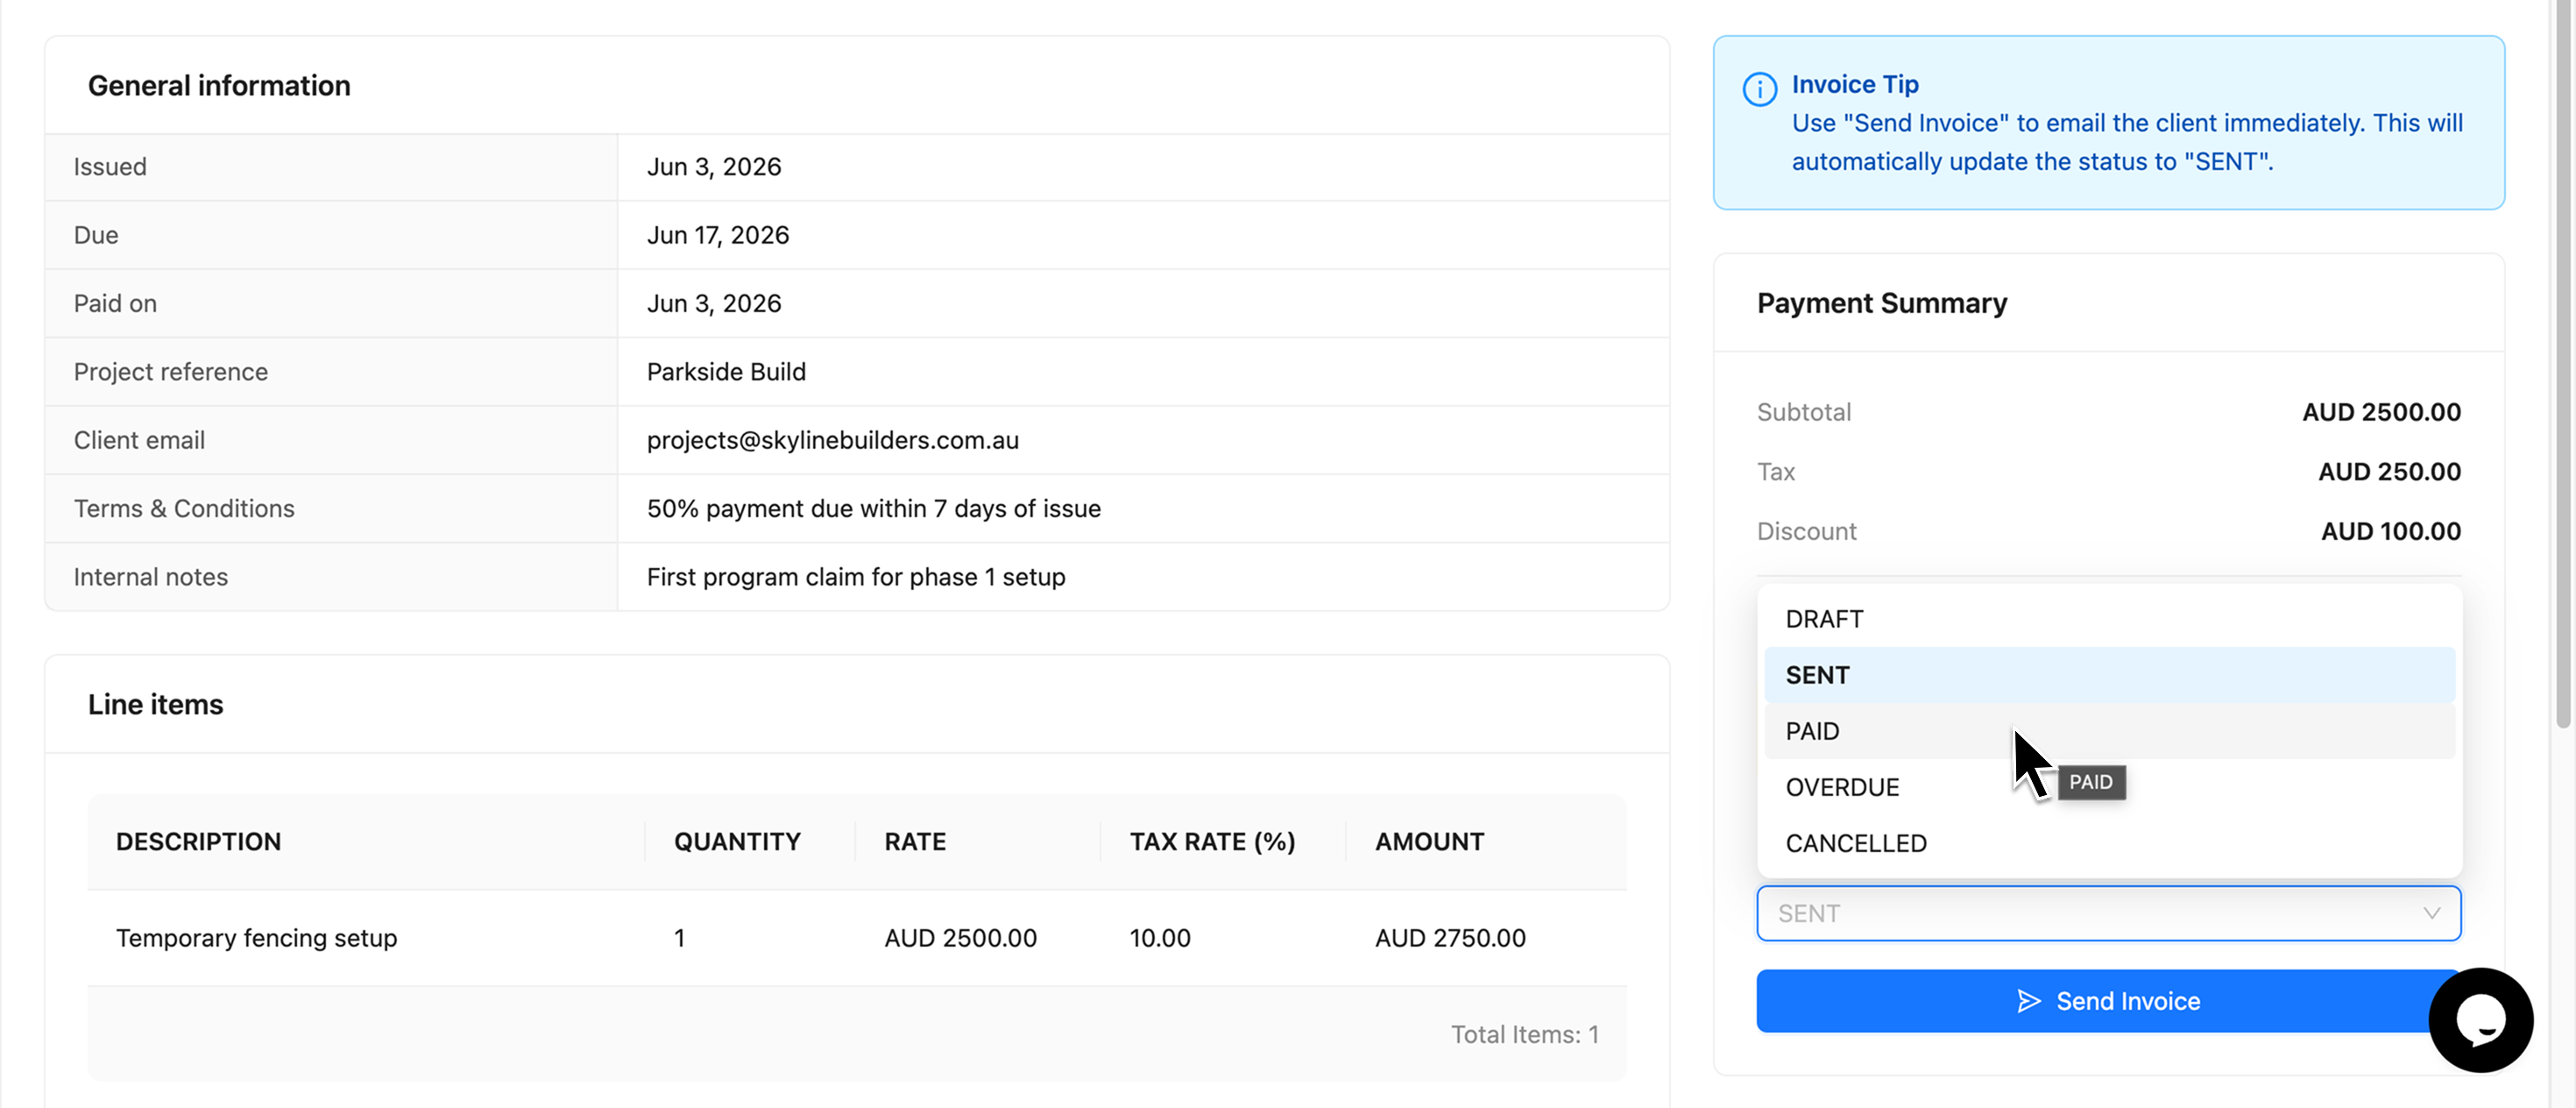
Track the lifecycle of your payments by updating the status dropdown. You can manually set an invoice to DRAFT, SENT, PAID, OVERDUE, or CANCELLED.
Recording a Payment
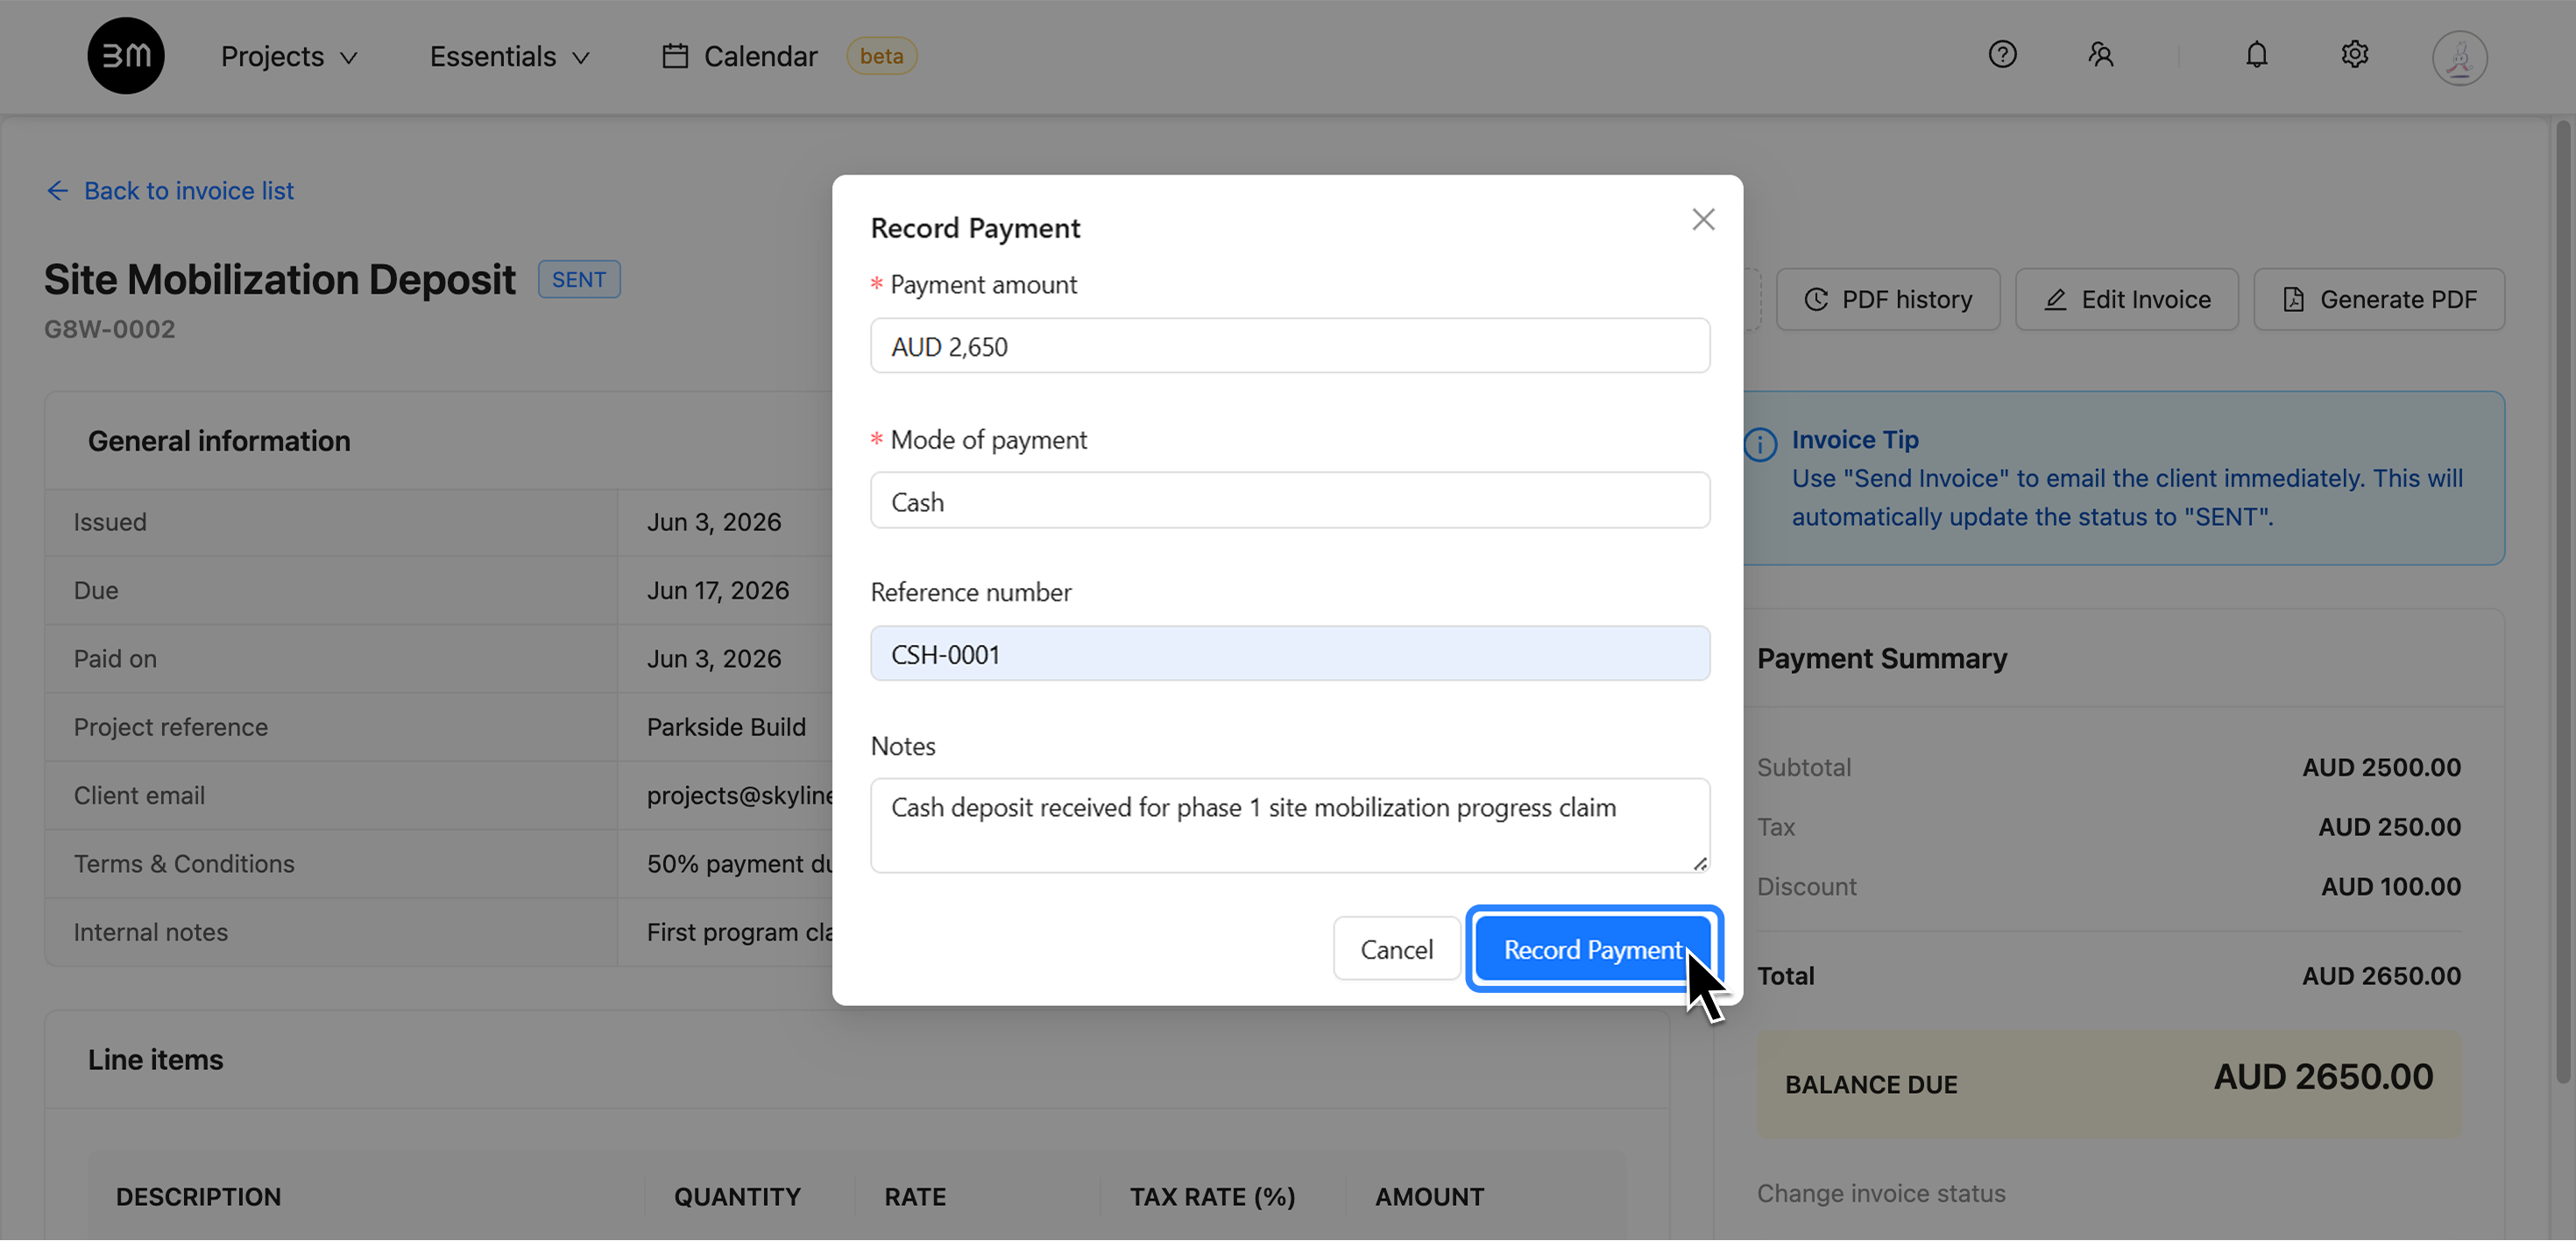
When you update an invoice status to PAID, Buildmate automatically opens the Record Payment modal to ensure your financial records are complete. You will be prompted to enter the following details:
- Payment Amount: Confirm the exact figure received in your currency (e.g., AUD).
- Mode of Payment: Select or type the method used, such as Bank Transfer, Cash, or Cheque.
- Reference Number: Add a tracking number (like a transaction ID or cheque number) for future audits.
- Notes: Include any additional context regarding the transaction.
Click Record Payment to finalize the entry and update your dashboard metrics.
6. Access Past Invoices
Your past invoices are stored every time you generate a new invoice.
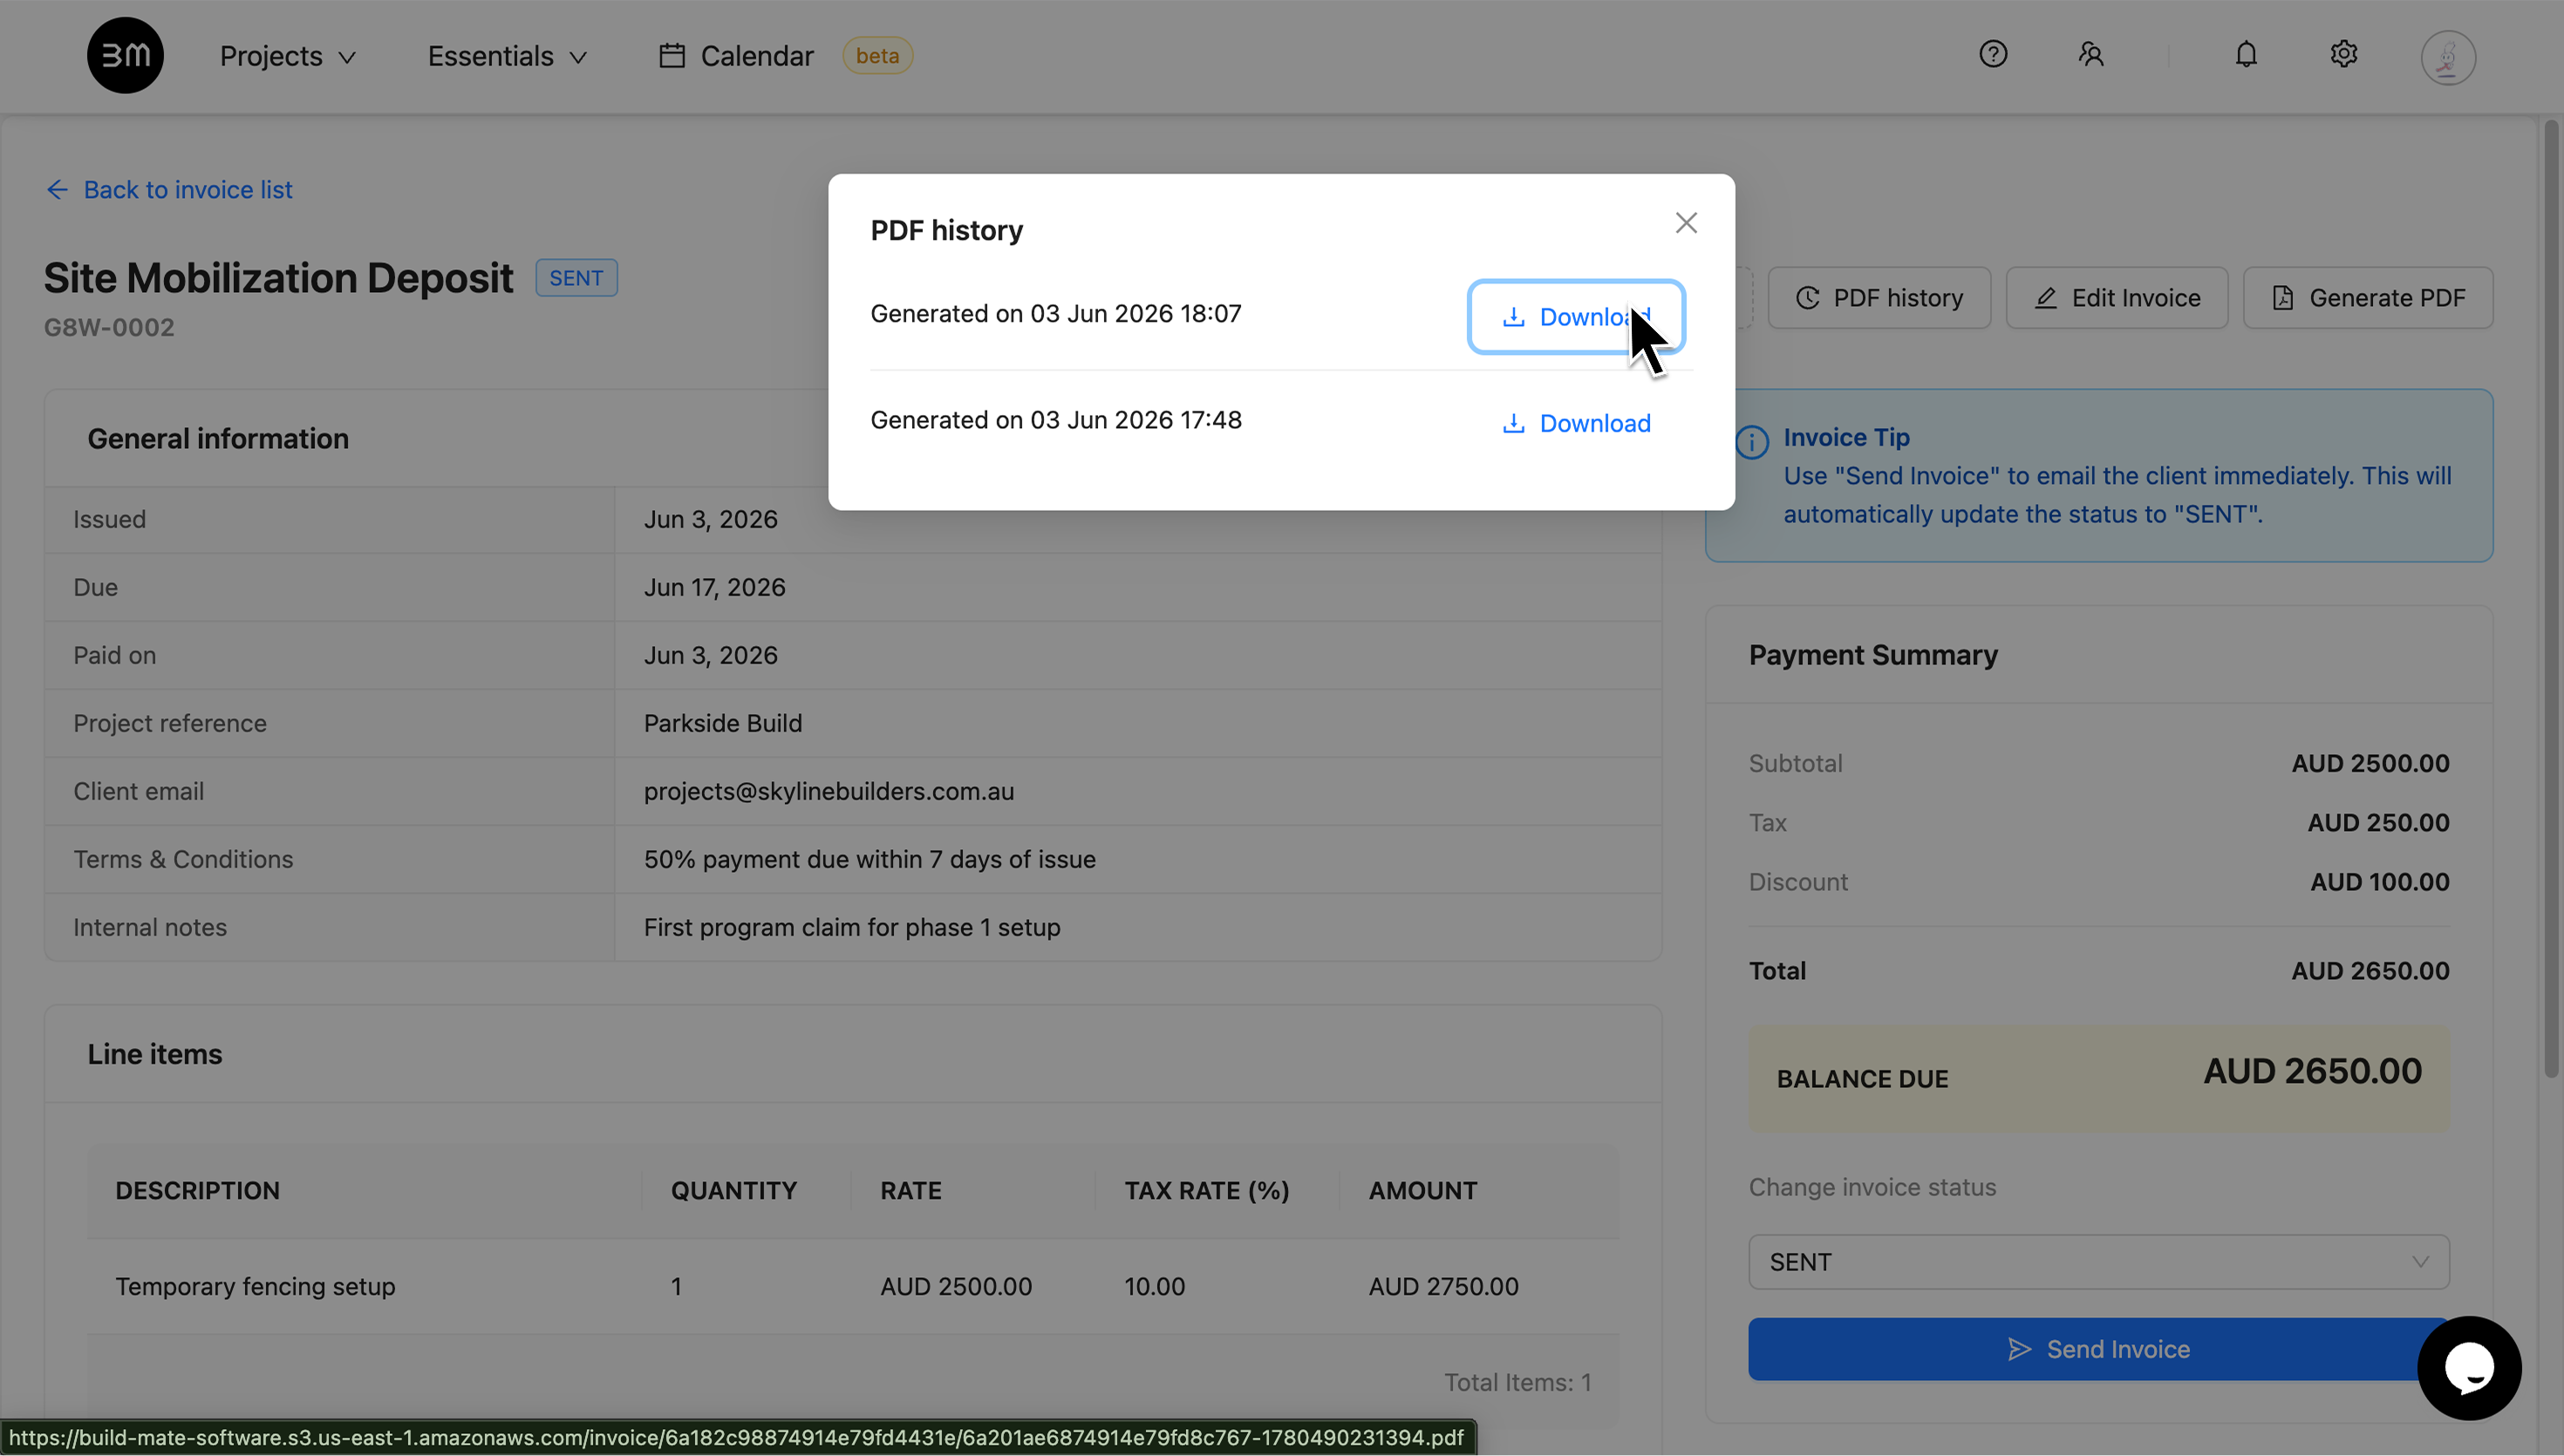
- Review History: Open the specific invoice and click the PDF History button at the top right. A modal will appear, displaying a list of every PDF ever generated for that specific invoice.
- Retrieve Files: Click the Download link next to any previous version to open it.
There you go! Now you can manage your entire billing lifecycle with precision — from the first draft to the final payment record.